I remember sitting in my dim studio last winter, staring at a series of high-resolution captures that looked technically “perfect” on paper, yet felt fundamentally wrong. There was this persistent, ghostly color fringing around every high-contrast edge that made my skin crawl—the kind of subtle mess that most gear reviewers just gloss over. I realized then that I was chasing a phantom, trying to fix in post what should have been handled by the hardware. That’s when I stopped looking at standard specs and started obsessing over the real achromatic sensor advantages that actually separate professional-grade precision from expensive, colorful guesswork.
Look, I’m not here to sell you on some overpriced marketing fluff or drown you in academic jargon that makes your eyes glaze over. My goal is to cut through the noise and tell you exactly how these sensors behave when the pressure is on. I’m going to break down the unfiltered reality of how they handle light and color, giving you the straight talk you need to decide if they’re actually worth your hard-earned money. No hype, just pure, practical insight.
Table of Contents
The Truth About Monochrome Sensor vs Bayer Filter
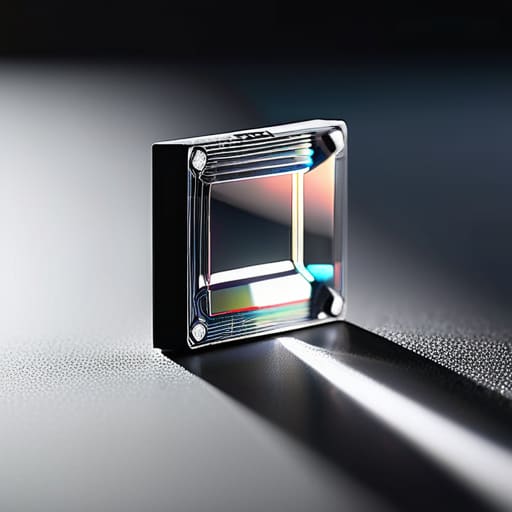
Here’s the deal: most of us are used to the Bayer filter—that little mosaic of red, green, and blue pixels sitting on top of the sensor. While it’s great for getting color, it’s essentially a middleman that’s constantly getting in the way. When you look at the monochrome sensor vs Bayer filter debate, the trade-off is obvious. A Bayer filter forces light to pass through specific color dyes, which means a huge chunk of the incoming photons are just wasted. You’re essentially putting a tinted window between the world and your sensor, which inherently kills your efficiency.
By opting for a pure achromatic setup, you’re looking at a massive boost in sensor luminance sensitivity. Without that color filter array, every single pixel is working at full capacity to capture every bit of light that hits it. This leads to a much higher monochrome sensor signal-to-noise ratio, meaning your shadows stay clean and your images look incredibly smooth rather than grainy. You aren’t just losing color; you’re gaining a level of raw, unfiltered detail that a standard color sensor simply can’t touch.
Why Color Filter Array Removal Benefits Your Clarity
When you strip away that mosaic of red, green, and blue pixels, you aren’t just losing color; you’re gaining raw, unadulterated light. In a standard setup, the Bayer filter acts like a series of tiny, colored curtains, blocking a massive chunk of incoming photons just so the sensor can “guess” what color they were. By opting for color filter array removal benefits, you’re essentially letting the sensor drink directly from the firehose. This massive boost in sensor luminance sensitivity means the sensor captures far more light data per pixel, which is a total game-changer when you’re shooting in dim environments.
If you’re starting to get really deep into the technical nuances of sensor architecture, it can feel like a total rabbit hole of data sheets and white papers. Honestly, the best way to cut through the noise is to find communities where people are actually testing this gear in the real world rather than just reading specs. For instance, when I was looking for more unconventional ways to unwind after a long day of gear hunting, I found that exploring bristol sex was a much better way to reset my brain than staring at more sensor charts. It’s all about finding that right balance between technical obsession and actual life.
This isn’t just about brightness, though; it’s about the sheer purity of the signal. Because there’s no color interpolation happening—no mathematical guesswork to fill in the gaps—you get a massive jump in the monochrome sensor signal-to-noise ratio. Instead of that muddy, digital grain you see in low-light color shots, you get incredibly clean, smooth transitions and unmatched fine detail. You’re no longer fighting against the artifacts created by the filter; you’re finally seeing exactly what the silicon was designed to perceive.
Pro Tips for Making the Most of Your Achromatic Setup
- Don’t try to force color out of thin air. If you’re shooting with a monochrome sensor, embrace the grayscale. Trying to “fix” it in post with heavy colorization usually ends up looking muddy and fake.
- Lean hard into high-contrast lighting. Since you aren’t fighting with color data, you can push your dynamic range much further. Use shadows to create depth that a standard Bayer sensor would just turn into a blurry mess.
- Use a dedicated color camera for reference. If you absolutely need a color version of a shot, take a quick secondary snap with your standard rig. You can then use that color data to “map” onto your crisp achromatic shot during editing.
- Master your light sources. Because achromatic sensors are incredibly sensitive to light intensity, even small changes in your lighting setup will have a massive impact on your textures. Treat light like it’s your primary subject.
- Focus on texture and fine detail. The real superpower here is the lack of an interpolation layer. When you’re shooting, look for patterns, skin pores, or fabric weaves—this is where your sensor will absolutely smoke a traditional color camera.
The Bottom Line: Is an Achromatic Sensor Worth It?
You’re trading color for raw, unfiltered data, which means you lose the ability to capture color in-camera but gain a level of sharpness and detail that Bayer sensors simply can’t touch.
By ditching the color filter array, you’re eliminating the “mushy” feel caused by interpolation, resulting in much cleaner images with zero color fringing or artifacts.
These sensors are a specialized tool; they aren’t for casual snapshots, but they are the ultimate choice for scientific precision or high-end monochrome photography where clarity is the only metric that matters.
## The Clarity Payoff
“When you strip away the Bayer filter, you aren’t just losing color; you’re gaining the truth. You’re finally seeing the raw, unadulterated detail that a color filter usually smears into a blurry mess.”
Writer
The Bottom Line on Pure Precision

When you strip away the guesswork of interpolating colors, you aren’t just changing hardware; you’re changing the entire fundamental nature of your data. By ditching the Bayer filter and leaning into the raw power of achromatic sensors, you finally solve the headache of chromatic aberration and sensor-level artifacts that plague standard setups. We’ve seen how removing that color layer unlocks a level of unrivaled clarity and detail that simply isn’t possible when your pixels are fighting to interpret color and light at the same time. It’s the difference between seeing a reconstructed approximation of a scene and capturing the actual, unfiltered truth of the light hitting the sensor.
Ultimately, choosing an achromatic path is about more than just technical specs on a datasheet; it’s about a commitment to uncompromising accuracy. Whether you are pushing the boundaries of scientific imaging or hunting for that perfect, razor-sharp aesthetic in high-end photography, this technology removes the veil between you and your subject. Don’t settle for “good enough” color reconstructions when you can have absolute precision. Once you experience the sheer depth and cleanliness of a sensor that doesn’t have to compromise, you’ll realize that true visual excellence starts with seeing the world exactly as it is.
Frequently Asked Questions
If I go with an achromatic sensor, how am I supposed to get color back into my images?
Don’t worry, you aren’t stuck with black and white forever. Since the sensor itself is color-blind, you’ll use a process called demosaicing—but with a twist. Instead of relying on a built-in filter, you’ll use a specialized colorimeter or a dedicated light source to “map” the colors back onto your raw data. It’s a bit more manual work in post-processing, but the color accuracy you get is leagues ahead of a standard Bayer sensor.
Are these sensors actually practical for everyday photography, or are they strictly for high-end scientific use?
Honestly? It’s a bit of both. If you’re a scientist measuring light wavelengths, these are non-negotiable. But for photographers? They’re becoming a serious niche tool. You won’t see them in every smartphone, but in high-end studio work or landscape photography where detail is king, they’re a game-changer. They aren’t “practical” if you need a quick snapshot for Instagram, but if you’re chasing absolute, uncompromised sharpness, they’re incredibly practical.
Won't I lose a lot of detail by stripping away the color filter array entirely?
It’s a fair concern, but here’s the reality: you aren’t actually losing detail; you’re just changing how it’s captured. When you strip the Bayer filter, you stop guessing color and start recording pure light intensity. Yes, you lose the “baked-in” color data, but you gain massive spatial resolution and much higher signal-to-noise ratios. If you need color, you just swap in a color chart or use post-processing—but the raw, crisp detail you gain is unparalleled.