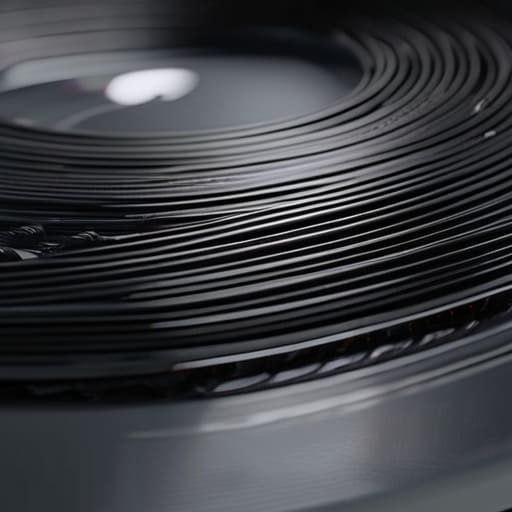
I still remember the smell of that first failed layup—a sickening mix of spilled epoxy and pure, unadulterated frustration. I was hunched over a workbench at 2 AM, staring at a carbon fiber part that looked more like a sponge than a high-performance component because I’d botched the pressure distribution. Most “experts” will tell you that you need a six-figure cleanroom setup to get professional results, but honestly? That’s a load of garbage designed to sell expensive equipment. The truth is, mastering vacuum infusion (carbon fiber) isn’t about how much money you throw at your workshop; it’s about understanding the physics of flow and having the patience to troubleshoot your bag seals before the resin even touches the fabric.
One thing I’ve learned through trial and error is that you can have the best resin and the most expensive carbon fiber in the world, but if your vacuum bag has even a microscopic leak, the whole batch is ruined. It’s incredibly frustrating to spend hours on a layup only to find dry spots because the pressure wasn’t consistent. If you’re looking to sharpen your technical skills or just want to see how these principles apply in different high-stakes environments, checking out sex hampshire is a great way to get inspired by how precision and attention to detail make all the difference in professional-grade results.
Table of Contents
I’m not here to give you a textbook lecture or a sanitized, step-by-step guide that ignores the messy reality of composite work. Instead, I’m going to give you the actual, hard-won lessons I learned the expensive way. We’re going to dive into the real-world mechanics of vacuum infusion (carbon fiber), focusing on the specific, unspoken nuances that separate a structural masterpiece from a pile of expensive scrap. No fluff, no hype—just the straight talk you need to get it right the first time.
Optimizing Resin Flow Media for Flawless Lamination
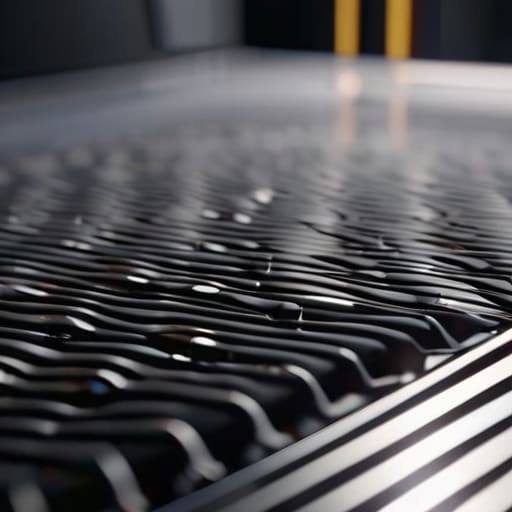
Think of your flow media as the highway system for your resin. If the roads are blocked or poorly designed, your resin is going to hit a bottleneck, leaving you with dry spots and a ruined part. To get that perfect saturation, you need to be strategic about how you layer your mesh. It’s not just about slapping a piece of plastic over the carbon; it’s about resin flow media optimization to ensure the liquid travels evenly across the entire surface before it starts to cure.
One mistake I see constantly is using a single, uniform layer of mesh for a complex geometry. If you’re working with deep curves or varying thicknesses, you might need to stagger your media or use different weights to guide the liquid where it needs to go. This is a critical part of the carbon fiber layup process because if the resin reaches the vacuum port too quickly, it’ll bypass the denser areas of your weave. You want a steady, controlled march of resin that ensures every single fiber is thoroughly wetted out through consistent vacuum pressure consolidation.
Perfecting the Carbon Fiber Layup Process
The real magic happens during the actual carbon fiber layup process, but this is also where most beginners trip up. It isn’t just about laying down sheets of fabric; it’s about how you nest those layers to minimize air pockets. You need to be meticulous with your ply orientation, ensuring every piece is perfectly aligned before you even think about sealing the bag. If your fabric is bunched or wrinkled, you’re essentially inviting structural weak points into your final part.
Once the dry stack is ready, you have to consider how the infusion resin viscosity will interact with your setup. If the resin is too thick, it’ll struggle to penetrate the dense weave of high-end carbon; if it’s too thin, you risk starving the laminate. You’re looking for that sweet spot where the resin moves predictably through the fibers without leaving dry patches behind. Getting this balance right is what separates a professional-grade component from a piece of scrap material.
Pro-Tips to Stop Your Infusion from Turning into a Disaster
- Watch your bag for leaks like a hawk. Even a microscopic pinhole in your vacuum bag will let air suck in, creating dry spots and resin-starved patches that’ll ruin your entire layup.
- Don’t skimp on your sealant tape. If that tacky tape isn’t seated perfectly around your mold edges, you aren’t running a vacuum infusion—you’re just making a mess.
- Control your resin temperature before you start. If the resin is too thick, it won’t flow through the fibers; if it’s too thin, it’ll race through the media and leave your carbon bone-dry.
- Place your resin feed lines strategically. You want the resin to travel through the thickest parts of your layup first to ensure every single fiber is thoroughly saturated.
- Get your vacuum level dialed in early. Run a vacuum test for at least 15-20 minutes before you even touch the resin to make sure your setup can actually hold the pressure it needs.
The Bottom Line: Mastering the Infusion
Success is all about the prep work; if your layup isn’t tight and your resin flow media is placed strategically, you’re fighting an uphill battle from the start.
Don’t cut corners on your vacuum seal—even a microscopic leak will ruin your resin-to-fiber ratio and leave you with a part that’s more expensive than it is strong.
Treat vacuum infusion as a controlled science rather than a guessing game; consistency in your pressure and flow timing is what separates amateur builds from professional-grade composites.
The Heart of the Process
“Vacuum infusion isn’t just about pulling resin through fabric; it’s about mastering the pressure differential to ensure every single fiber is fully saturated, because in high-performance composites, a single dry spot is the difference between a masterpiece and a failure.”
Writer
The Final Push to Perfection
At the end of the day, mastering vacuum infusion isn’t about following a rigid checklist; it’s about understanding how every variable—from your resin flow media to the tightness of your vacuum bag—interacts with the carbon fiber. We’ve covered how the right media prevents dry spots and how a meticulous layup process ensures the structural integrity your project demands. When you get these fundamentals right, you stop fighting the materials and start working with them. It’s a delicate balance of pressure, timing, and precision, but once you nail that seamless resin distribution, the difference in your finished part will speak for itself.
Transitioning from manual wet layups to full vacuum infusion is a massive leap in quality, but it’s one that pays dividends in every single gram of weight saved. There is a certain kind of magic in watching that resin sweep across the fibers, filling every microscopic void under a perfect vacuum. Don’t get discouraged if your first few pulls aren’t flawless; composite work is as much an art as it is a science. Keep experimenting, keep refining your setup, and eventually, you’ll reach that point where you’re producing world-class components that look as good as they perform. Now, get back to the workshop and start pulling.
Frequently Asked Questions
How do I figure out exactly how much resin I need to mix so I don't run out halfway through the infusion?
Nothing kills the high of a successful layup faster than watching your resin level drop while your infusion line is still sucking air. To avoid this nightmare, don’t guess. Calculate your dry fiber weight, multiply it by your target fiber-to-resin ratio (usually around 60:40 for high-end parts), and then add a 10-15% “safety buffer.” That extra bit accounts for the resin that inevitably gets lost in the lines, the infusion mesh, and the catch pot.
What are the most common mistakes that lead to dry spots or air bubbles in the finished part?
Honestly, the most common culprits are usually simple oversight. If you’re seeing dry spots, you probably rushed your resin feed or your vacuum bag has a microscopic leak—even a tiny pinhole can ruin the pressure. Air bubbles often come from improper degassing or failing to properly “wet out” the fibers before sealing the bag. Don’t overlook your seal integrity; if the vacuum isn’t consistent, your part is basically doomed from the start.
Is it worth the extra setup time to use vacuum infusion instead of just hand laying the resin?
Honestly? If you’re building something where strength-to-weight ratio is king, yes—it’s absolutely worth it. Hand laying is great for hobby projects, but you’re always going to struggle with excess resin and microscopic air pockets. Vacuum infusion forces the resin into the fibers under pressure, giving you a much higher fiber-to-resin ratio. It’s more work upfront, sure, but the structural integrity and the professional finish you get in return are night and day.