I still remember the day I had to sew a button back onto my favorite coat – I was running late for a library event, and the last thing I needed was a wardrobe malfunction. But as I sat there, thread in hand, I realized that I had no idea where to start. It was a frustrating moment, but it taught me that sometimes, the smallest tasks can be the most overwhelming. That’s why I want to share with you my simple, step-by-step guide to sewing a button, so you never have to feel that sense of uncertainty again.
In this article, I’ll walk you through the basics of sewing a button, from choosing the right thread to tying the perfect knot. You’ll learn how to approach this task with confidence, and I’ll share some helpful tips that I’ve picked up along the way. My goal is to make sewing a button feel like a manageable, even enjoyable, task – not a source of stress or anxiety. By the end of this guide, you’ll be equipped with the knowledge and skills you need to tackle this simple yet essential sewing task, and you’ll be able to breathe new life into your favorite clothes.
Table of Contents
Project Overview
Total Time: 15 minutes
Estimated Cost: $0 – $5
Difficulty Level: Easy
Tools Required
- Sewing Needle ((sharp, heavy-duty))
- Scissors ((dedicated to cutting thread))
- Thimble ((optional, for protection))
Supplies & Materials
- Button ((matching the original or replacement))
- Thread ((color matching the fabric))
- Fabric ((for practice or reinforcing the area around the button, approximately 6 inches square))
Step-by-Step Instructions
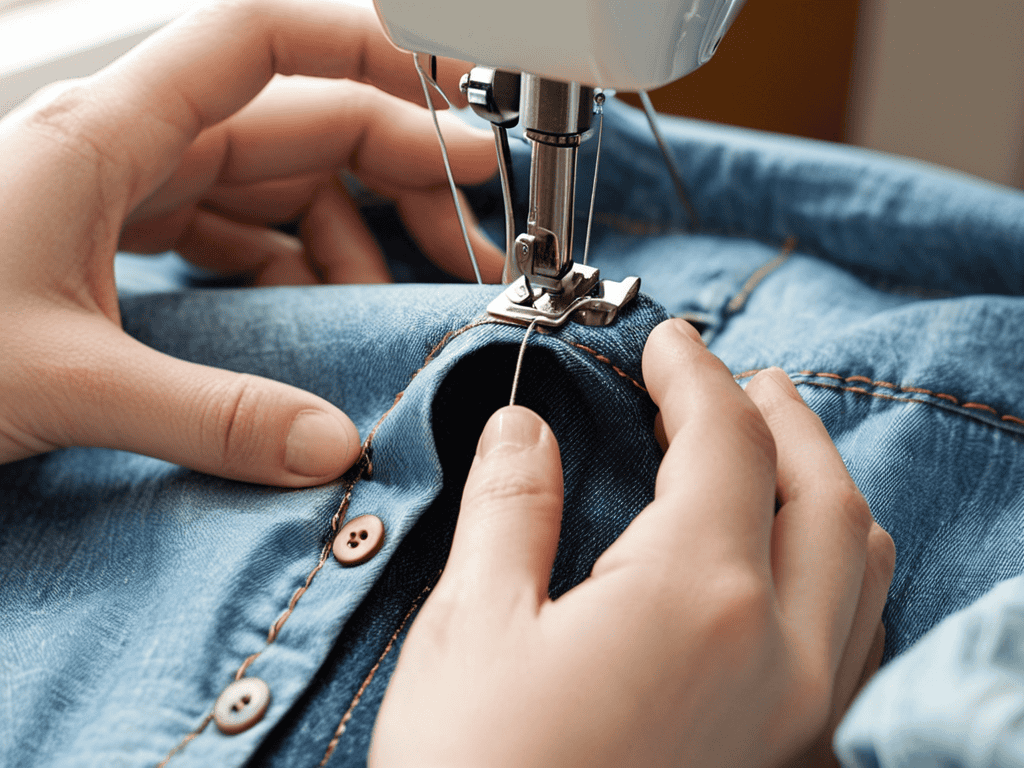
- 1. First, let’s start by gathering our materials, which include the garment with the missing button, a needle, some thread that matches the color of the garment as closely as possible, and of course, the button itself. It’s essential to have good lighting to see what you’re doing, so find a comfortable and well-lit spot to work.
- 2. Next, we need to prepare the area where the button will be sewn. This involves turning the garment inside out and locating the spot where the button belongs. If there are any remaining stitches from the old button, you might want to gently remove them to start with a clean slate. Remember, the key here is to be patient and take your time.
- 3. Now, it’s time to thread your needle. Cut a piece of thread about 12-18 inches long and thread it through the needle’s eye. Tie a knot at the end of the thread to prevent it from slipping back through the needle as you sew. This step requires a bit of finesse, but don’t worry if it takes a couple of tries to get it right.
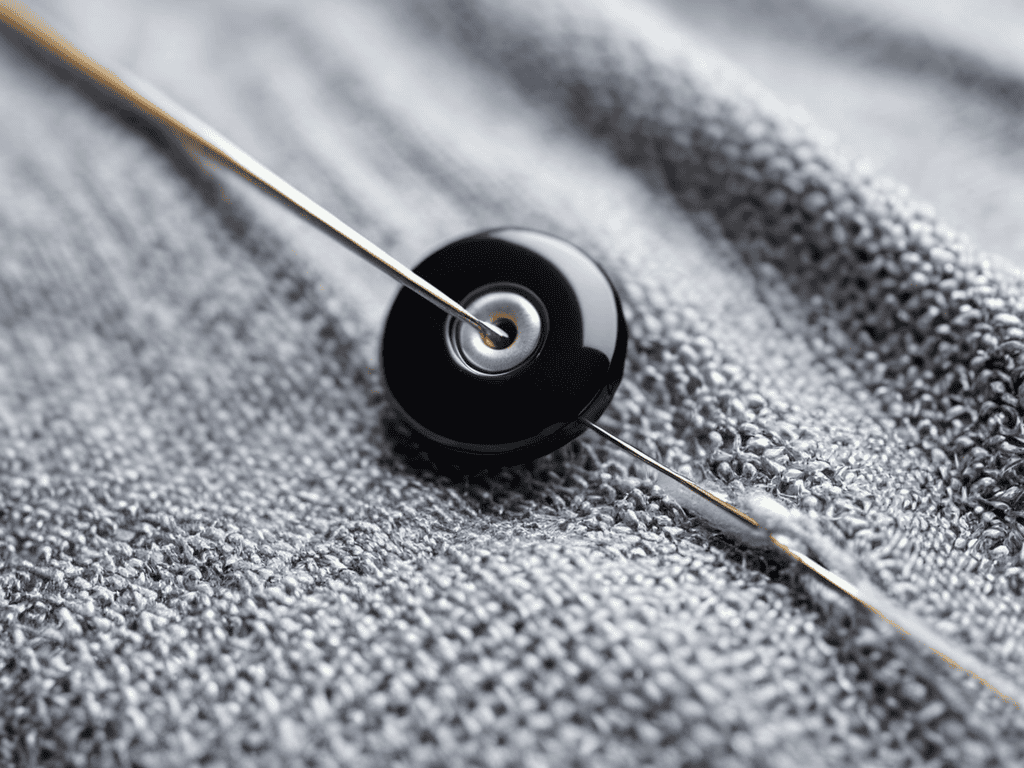
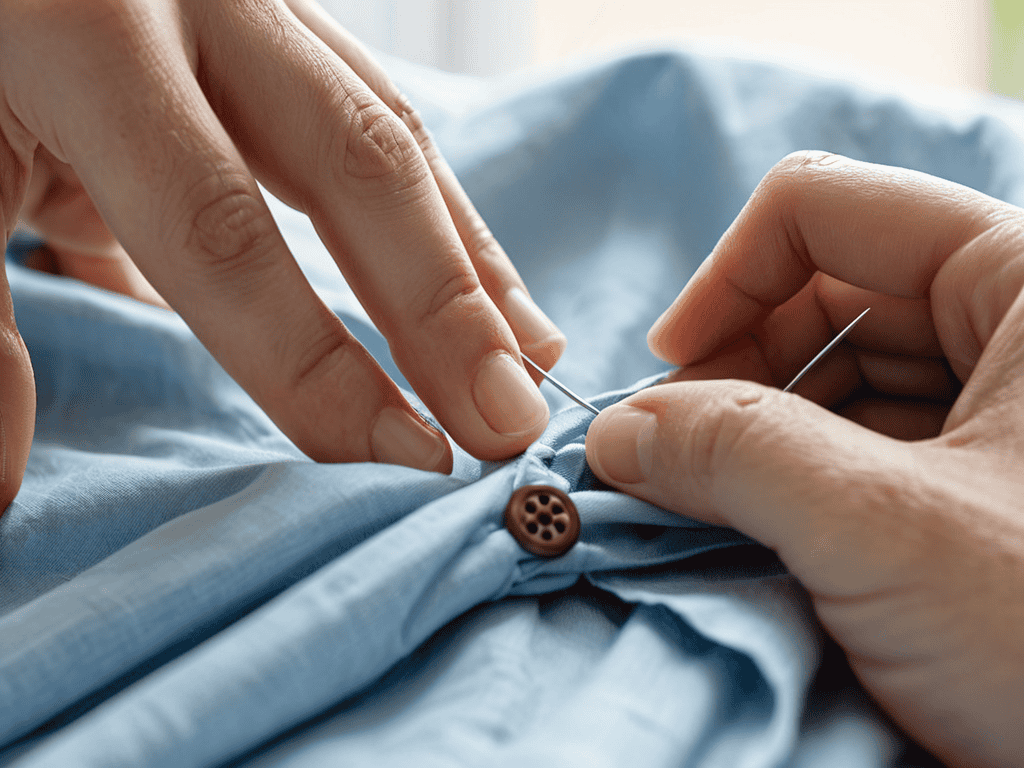
- 4. With your needle and thread ready, bring the needle up through the fabric from the underside of the garment, right through the center of where the button will sit. Then, push the needle through one of the button’s holes. Pull the thread gently to remove any slack, but be careful not to pull too hard, as this can pucker the fabric.
- 5. Next, you’ll need to secure the button by sewing it in place. To do this, bring the needle back down through the other hole in the button and then through the fabric, creating a small stitch. Repeat this process several times, moving around the button to ensure it’s securely attached. Remember to keep your stitches even and consistent for a professional finish.
- 6. As you sew, make sure to leave a small space between each stitch. This will help the button lie flat against the garment. Once you’ve completed the stitches around the button, tie off the thread with a knot on the underside of the garment to keep everything in place. It’s a good idea to make a few extra knots to ensure the thread doesn’t come undone over time, which could lead to the button falling off again and causing more frustration.
- 7. Finally, turn your garment right side out and inspect your handiwork. Give the button a few tugs to make sure it’s securely attached. If it feels loose, you may need to go back and add a few more stitches. And that’s it! With these simple steps, you’ve managed to sew a button back onto your favorite garment, extending its life and saving you the hassle of dealing with a missing button, which can be a real time-saver in the long run.
Sewing a Button
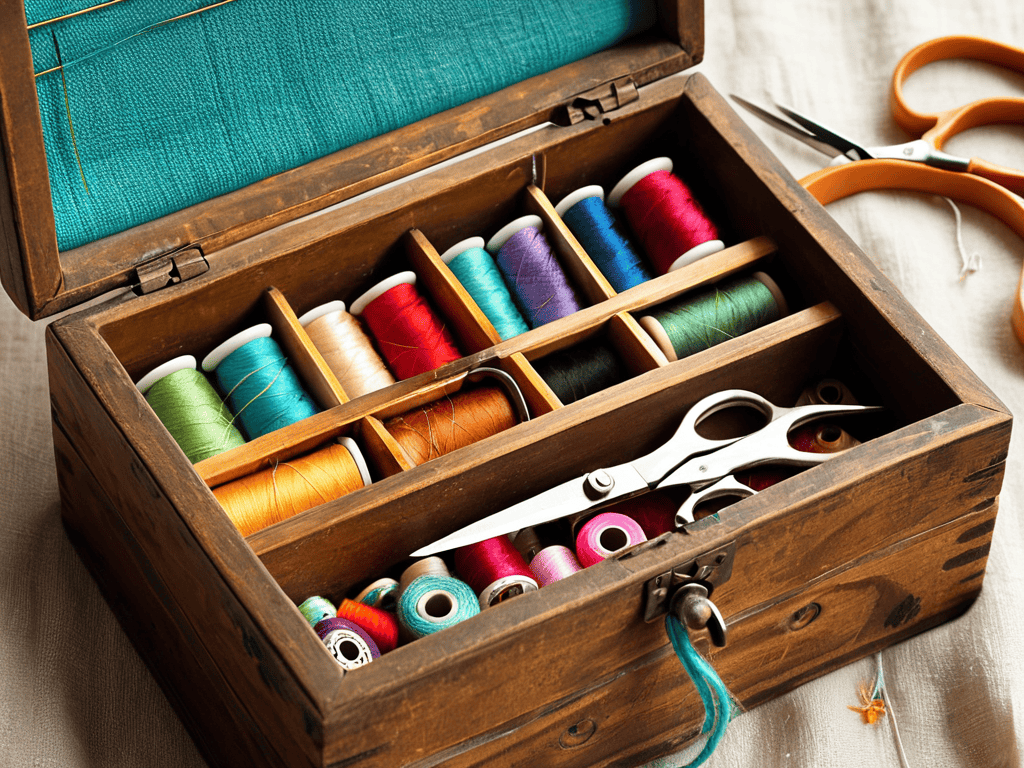
As you work on fixing that loose button, it’s essential to have a well-stocked sewing kit essentials box nearby. This will ensure you have all the necessary tools, such as threads, needles, and scissors, to complete the task efficiently. When it comes to threads, there are various types of button threads to choose from, but a simple cotton or polyester thread usually does the trick.
As you continue on your sewing journey, you might find yourself eager to explore more projects and connect with like-minded individuals who share your passion for crafting and DIY endeavors. For those looking to expand their community, I’ve found that online forums and local meetups can be a great way to discover new ideas and get feedback on your work. If you’re interested in finding groups or resources in your area, you can start by searching for local sewing clubs or checking out websites like sextreffen rheinland-pfalz, which often list community events and gatherings. Remember, the key to improving your skills is consistent practice and a willingness to learn from others, so don’t be afraid to reach out and join the conversation.
When sewing, it’s crucial to use the right hand sewing stitches for beginners, such as the running stitch or the whipstitch. These stitches are easy to learn and will help you secure the button in place. Additionally, being aware of common sewing mistakes to avoid, like pulling the thread too tight or using the wrong needle size, can make a significant difference in the outcome.
To achieve a professional-looking result, consider investing in a variety of sewing needle sizes explained in your sewing kit. This will allow you to choose the perfect needle for the job, ensuring a smooth and even stitch. By following these tips and practicing your sewing skills, you’ll be able to tackle even the most daunting button replacement techniques with confidence.
Gentle Guide to Sewing Kit Essentials
To get started with sewing a button, you’ll need a few basic essentials in your sewing kit. I like to think of it as gathering my favorite books for a research project – it’s all about having the right tools at your fingertips. For sewing a button, you’ll need a needle, some thread that matches your garment, and of course, the button itself.
I recommend keeping these essentials organized in a small container or pouch, so they’re easy to find when you need them. As someone who loves bookbinding and organizing, I can assure you that having a tidy sewing kit makes all the difference in reducing stress and making the process enjoyable. With these basics in place, you’ll be well on your way to sewing a button with ease and confidence.
Mastering Hand Sewing Stitches for Beginners
To master hand sewing stitches for beginners, let’s focus on the running stitch and the whipstitch. These two stitches are essentials in your sewing kit and will help you sew a button securely. The running stitch is the most basic stitch, where you simply insert the needle in and out of the fabric in a straight line. The whipstitch, on the other hand, is used to finish seams and prevent fraying.
I recommend practicing these stitches on a scrap piece of fabric before sewing your button. This will help you get a feel for the stitches and build your confidence. With a little practice, you’ll be sewing like a pro in no time.
Sewing with Ease: 5 Essential Tips for a Secure Button
- Choose the right needle: Select a sharp, heavy-duty needle that can easily pierce through fabric and button holes
- Thread it correctly: Use a matching thread color and tie a secure knot at the end to prevent it from coming loose while sewing
- Find the perfect stitch: The running stitch or whipstitch works well for sewing buttons, but feel free to experiment with other stitches for added security
- Keep it centered: Place the button in the center of the buttonhole or the area where you want it to be, and use a pin to hold it in place while you sew
- Double-check your work: Give the button a few tugs to make sure it’s securely attached, and add a few extra stitches if needed for added reinforcement
3 Key Takeaways for a Stress-Free Sewing Experience
Sewing a button is a simple, empowering skill that can extend the life of your favorite clothes and save you money in the long run
Having the right sewing kit essentials, such as a needle, thread, and scissors, can make all the difference in achieving professional-looking results
Mastering basic hand sewing stitches, like the running stitch and whipstitch, can help you tackle more complex projects and build confidence in your sewing abilities
A Stitch in Time
Sewing a button is more than just a practical skill, it’s a reminder that even the smallest acts of repair and care can weave a sense of calm and control into our busy lives.
Hannah Jensen
Conclusion
As we’ve journeyed through this guide on sewing a button, we’ve covered the essential tools in your sewing kit, mastered the basic hand sewing stitches, and walked through a step-by-step process to securely attach a button to your favorite garment. By following these simple steps, you’ve not only learned a valuable skill but also taken control of small repairs that can make a big difference in extending the life of your clothes. Remember, sewing a button is just the beginning of your DIY journey, and with practice, you’ll become more confident in tackling more complex projects.
As you close this guide, I want to leave you with a final thought: empowerment through knowledge is the key to unlocking a more self-sufficient, calmer life. By mastering small tasks like sewing a button, you’re not just fixing a piece of clothing; you’re building a sense of capability and independence that can spill over into other areas of your life. So, go ahead, take on that next project, and remember, every small victory is a step towards a more fulfilling and peaceful you.
Frequently Asked Questions
What type of needle is best for sewing a button?
For sewing a button, I recommend using a sharp, heavy-duty needle like a tapestry needle or a blunt-tipped darning needle. These types of needles are sturdy enough to push through thick fabric and won’t slip out of the button holes, making the process much easier and less frustrating.
How do I know which thread color to use for my button?
To choose the right thread color, match it to the button or the dominant color of your garment. If you’re unsure, a neutral thread like beige, gray, or navy usually blends in nicely. You can also use a thread that complements the color of your fabric for a decorative touch.
What if my button has multiple holes, how do I sew it securely?
For buttons with multiple holes, I recommend using a simple running stitch or a whipstitch to secure it. Start by threading your needle and tying a knot, then bring the needle up through one hole and down through another, repeating this process until the button feels snug.