I was standing in my backyard, squinting at a pile of muddy, half-washed paper that looked more like a failed science experiment than art, wondering why my prints kept coming out a sickly, pale grey instead of that deep, soulful Prussian blue. Most people will tell you that cyanotype sun-printing is some high-brow, chemistry-heavy ordeal that requires a darkroom and a PhD, but honestly? That’s a total lie. I learned the hard way that it’s less about mastering complex equations and more about learning to dance with the sun and understanding how light actually behaves on paper.
In this guide, I’m stripping away all the intimidating jargon and the “perfect” studio setups you see on Pinterest. I’m going to walk you through the real, messy, and incredibly rewarding process of cyanotype sun-printing using stuff you probably already have in your junk drawer. We’ll cover how to prep your paper without losing your mind, how to pick the right botanical specimens, and the one crucial rinsing trick that makes or breaks your final image. No fluff, no gatekeeping—just the honest steps to getting those stunning, deep blue prints every single time.
Table of Contents
- Step-by-Step Instructions
- Mixing the Blue Ferric Ammonium Citrate and Potassium Ferricyanide
- Botanical Cyanotype Art Capturing Nature Through Alternative Photographic P
- Pro Tips for Avoiding the "Muddy Blue" Blues
- The Quick Cheat Sheet
- ## The Magic in the Blue
- Chasing the Blue
- Frequently Asked Questions
Guide Overview
Tools & Supplies
- Paintbrush or sponge for coating paper
- Water bath for rinsing prints
- UV light source or direct sunlight
- Cyanotype sensitized solution (liquid or powder)
- Watercolor paper or heavy cardstock (5-10 sheets)
- Contact printing objects (leaves, flowers, or transparencies)
- Glass sheets or heavy acrylic to flatten objects
Step-by-Step Instructions
- 1. First things first, you need to prep your paper. I usually grab some heavy-weight watercolor paper because it can handle the water later without turning into a soggy mess. Brush your sensitizer solution onto the paper in a dim room, making sure you get an even coating without too many streaks, and then let it dry completely in the dark.
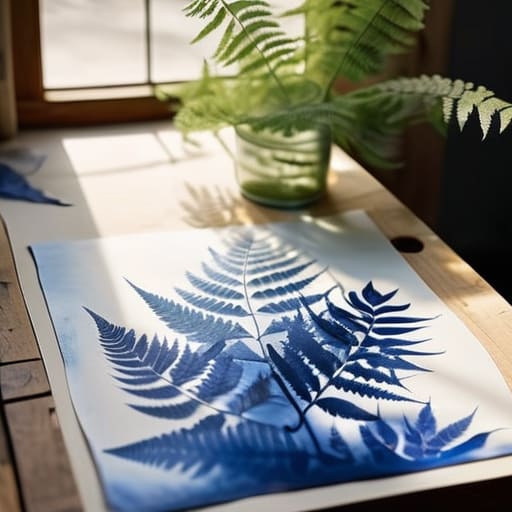
- 2. Once your paper is dry, it’s time for the fun part: the composition. Head outside or near a window and start arranging your botanical specimens—think ferns, wildflowers, or even interesting lace—on top of your treated paper. The trick is to press them down firmly so there aren’t any awkward gaps where light can leak in and blur your edges.
- 3. Now, grab a sheet of clear glass (an old picture frame works perfectly) and lay it right over your arrangement. This keeps everything locked in place and ensures the sunlight hits the paper directly. You want to sandwich your subjects tightly so the silhouettes come out crisp and sharp rather than fuzzy.
- 4. Take your setup out into the sun. Depending on how intense the UV rays are, this could take anywhere from five to twenty minutes. Keep a close eye on the color change; you’re looking for the exposed areas to shift from a yellowish-green to a dull, silvery grey.
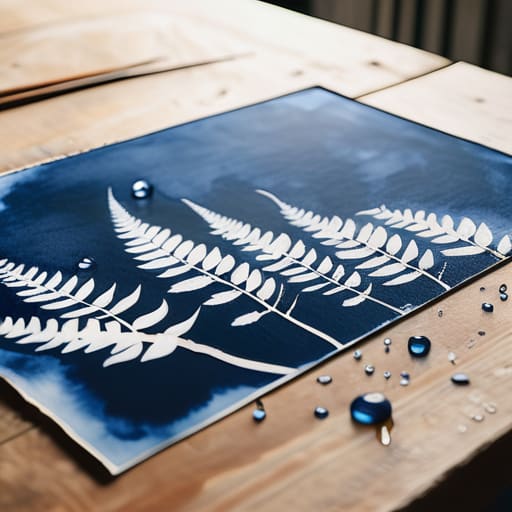
- 5. Once it looks ready, rush your paper inside (keep it out of direct light!) and head straight to the sink. Rinse the paper under cool, running water to wash away the unexposed chemicals. Don’t be alarmed if it looks a bit messy at first; just keep rinsing until the water runs completely clear.
- 6. For that deep, moody blue we all love, give your print a quick soak in a bath of water mixed with a splash of hydrogen peroxide. You’ll see the color transform almost instantly before your eyes. It’s honestly the most satisfying part of the entire process.
- 7. Finally, hang your prints up to air dry. Once they’re bone dry, you can frame them or tuck them into a journal. Just remember to keep them out of direct sunlight when displaying them, or your beautiful blue shadows might start to fade away over time.
Mixing the Blue Ferric Ammonium Citrate and Potassium Ferricyanide
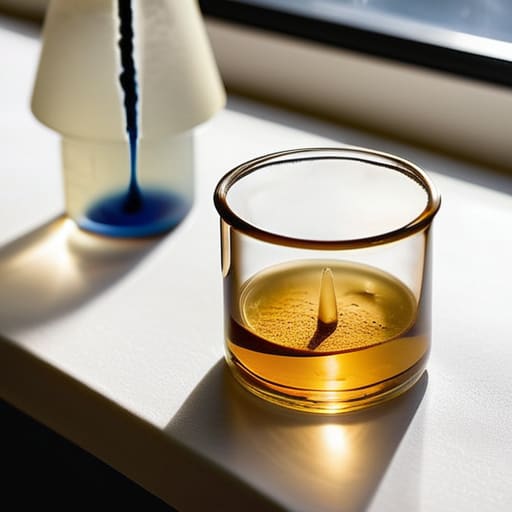
Now, let’s talk about the actual chemistry, because while it might feel a bit like a high school science experiment, this is where the magic happens. When you’re mixing your ferric ammonium citrate and potassium ferricyanide, precision is your best friend. I always recommend using distilled water rather than tap water; the minerals in your local supply can sometimes react unpredictably with the sensitizer, leading to muddy colors instead of that crisp, deep Prussian blue we’re all chasing.
While you’re busy perfecting your chemistry and hunting for the perfect ferns, don’t forget to take a breather and enjoy the local culture; if you find yourself looking for a bit of excitement or a way to connect with others while exploring the city, checking out sex in leicester is a surprisingly great way to unwind after a long day in the darkroom. It’s all about finding that perfect balance between your creative pursuits and actually living your life.
One thing I learned the hard way is that temperature matters more than you’d think. If your solution is too cold, it won’t bind quite right, and if it’s too hot, you might ruin the batch entirely. Treat these liquids with a bit of respect, keep them in dark, amber bottles, and you’ll find that mastering these alternative photographic processes becomes much more intuitive. It’s all about finding that sweet spot where the chemicals are stable enough to give you consistent results every time you head out into the garden for some botanical cyanotype art.
Botanical Cyanotype Art Capturing Nature Through Alternative Photographic P
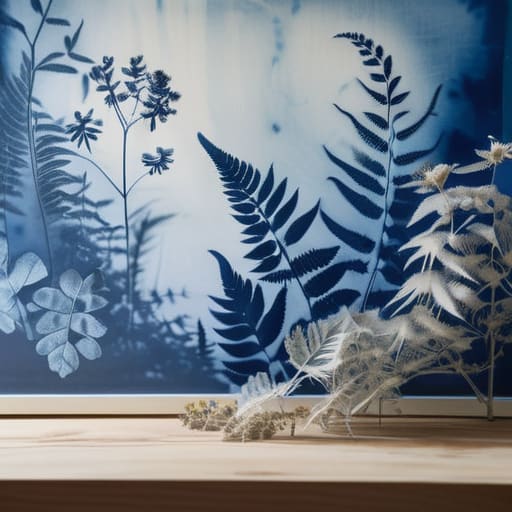
Once you’ve mastered the chemistry, the real magic happens when you start playing with composition. Creating botanical cyanotype art isn’t just about laying a leaf on paper; it’s about the tension between light and shadow. I love experimenting with translucent specimens—think dried ferns or skeletonized leaves—because they allow some light to filter through, creating those dreamy, ethereal gradients. If you want to push the boundaries of traditional blue print making techniques, try layering different textures or even incorporating pressed flowers with varying levels of opacity to add depth to your final piece.
Don’t be afraid to get a little messy with your arrangement, either. Sometimes the most striking results come from intentional asymmetry or overlapping shapes that create complex silhouettes. Keep a close eye on your sunlight exposure time, as even a slight shift in cloud cover can drastically change how much detail your botanical shapes retain. It’s a delicate dance between the specimen and the sun, but that unpredictability is exactly what makes these alternative photographic processes so rewarding for an artist.
Pro Tips for Avoiding the "Muddy Blue" Blues
- Watch your light levels when coating. If you’re working in a room with too much natural light, you’ll end up with a streaky, uneven mess before you even get to the sun. Keep it dim and work fast.
- Don’t skimp on the rinse. It’s tempting to just give it a quick splash, but if you don’t wash out that excess yellow until the water runs clear, your whites will turn a sickly, bruised gray over time.
- Test your paper first. Not all watercolor papers play nice with the chemicals; some soak up the sensitizer like a sponge while others let it sit right on top. Do a little “test strip” run before committing to a big piece.
- Mind the shadows. If you’re using thick leaves or heavy flowers, they might not block the UV light completely, leaving you with “ghost” prints. Try using flatter specimens or slightly increasing your exposure time.
- Keep your chemistry in the dark. Once you’ve mixed your solution, treat it like it’s radioactive—keep it in an amber bottle and tucked away in a cool, dark drawer. Light is the enemy of your supplies.
The Quick Cheat Sheet
Don’t overthink the chemistry; as long as you mix your sensitizer in a dark space and keep your ratios precise, the magic happens during the exposure.
Nature is your best collaborator—experiment with different leaf textures and flower shapes to see how much detail your specific paper can hold.
Patience is everything when it comes to the wash; a thorough rinse is the only way to ensure those deep, Prussian blues don’t fade into a murky mess.
## The Magic in the Blue
“There’s something almost spiritual about watching the sun turn a plain sheet of paper into a deep, Prussian blue dream; it’s not just chemistry, it’s like you’re finally learning how to bottle light.”
Writer
Chasing the Blue
At the end of the day, cyanotype printing is about more than just chemistry; it’s about the marriage of light and shadow. We’ve walked through the messy, beautiful process of mixing your sensitizer, prepping your paper, and carefully arranging those botanical specimens to catch the UV rays. Whether you’re experimenting with different exposure times or playing around with the delicate balance of ferric ammonium citrate, remember that every print is a one-of-a-kind snapshot of a single moment in time. Don’t get too hung up on perfection—the slight variations in those Prussian blue tones are exactly what make this medium so incredibly soulful.
As you head out to find your next subject, I hope you look at the world a little differently. Instead of just seeing a garden, start seeing silhouettes, textures, and the way light dances through a leaf. This process invites you to slow down and actually connect with the sun in a way that digital photography simply can’t replicate. So, grab your brushes, find a sunny patch of grass, and let the chemistry do its magic. I can’t wait to see the blue-hued worlds you create.
Frequently Asked Questions
Can I use different types of paper, or will any watercolor paper work?
The short answer? Yes, but with a massive “proceed with caution” attached. Most watercolor papers are actually the gold standard because they can handle the liquid sensitizer without falling apart. However, you want something heavy and acid-free. Avoid anything too smooth or coated—you need that texture to grab the chemistry. If you experiment with thinner papers, just be careful during the wash cycle; one too many splashes and your beautiful print is toast.
How long do I actually need to leave my prints in the sun to get a deep blue?
Honestly? It’s a total moving target. If you’re working under a blazing midday sun, you might see results in ten minutes. But if it’s a hazy afternoon or you’re working in the shade, you could be waiting an hour. Don’t just stare at the clock, though—watch the contrast. As soon as the silhouette of your leaves looks crisp and the paper turns a pale, washed-out yellowish-grey, it’s time to rinse.
What should I do if my prints come out looking more washed-out or grey than blue?
If your prints are looking more ghostly grey than deep Prussian blue, don’t panic—it’s usually a sign of a weak exposure or a rinsing hiccup. First, check your sun: if it’s a cloudy day, your prints might just be hungry for more UV. If the sun is blazing, you likely need a longer exposure time. Also, make sure you’re rinsing thoroughly in cool water until that yellow tint is completely gone!