I still remember the day I decided to digitize my old film reels using DSLR Film Scanning. It was like uncovering a treasure trove of memories, with each scan revealing a new level of detail and color that I never thought possible. The common myth that you need expensive equipment to get good results is simply not true. With the right techniques and a basic understanding of how to use your DSLR, you can achieve stunning results that will make your old films look like they were shot yesterday.
In this article, I’ll share my personal experience and no-nonsense advice on how to get started with DSLR Film Scanning. You’ll learn how to prepare your films, set up your camera, and adjust your settings for optimal results. I’ll also cover some common pitfalls to avoid and provide tips on how to edit and enhance your scanned images. By the end of this guide, you’ll be equipped with the knowledge and confidence to breathe new life into your old film reels and relive your favorite memories in stunning detail.
Table of Contents
Project Overview
Total Time: 1 hour 30 minutes to 3 hours
Estimated Cost: $100 – $300
Difficulty Level: Intermediate
Tools Required
- DSLR Camera ((with manual focus and aperture control))
- Macro Lens ((50mm or 60mm))
- Tripod ((sturdy and adjustable))
- Lighting Kit ((softbox or natural light))
- Remote Shutter Release ((or camera timer))
- Image Editing Software ((e.g., Adobe Lightroom or Photoshop))
Supplies & Materials
- 35mm Film Strips ((or other film formats))
- Film Holder or Mask ((to hold film in place))
- White Cardstock ((for diffusing light))
- Black Cardstock ((for reducing glare))
- Tape ((e.g., masking or scotch tape))
Step-by-Step Instructions
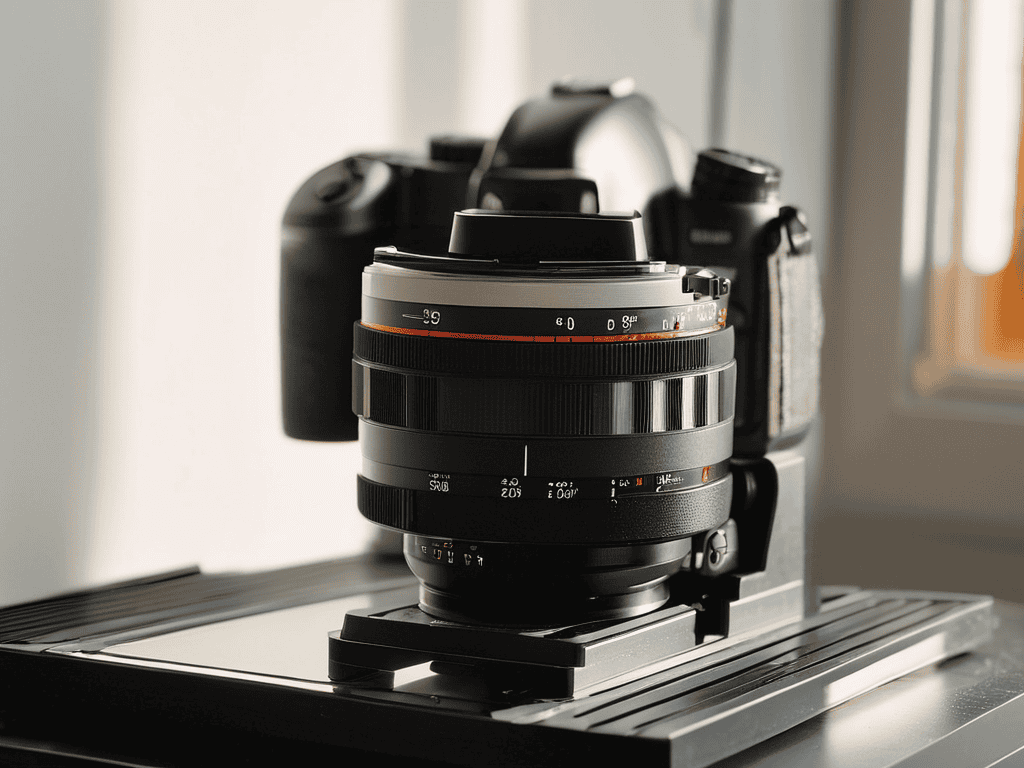
- 1. First, let’s get started with the basics – you’ll need a DSLR camera with a decent macro lens to capture high-quality images of your film negatives or positives. I used my old Nikon D7000 with a 60mm macro lens, and it worked like a charm.
- 2. Next, you’ll need to set up your scanning station, which can be as simple as a lightbox or a DIY diffused light source. The goal is to have a soft, even light that won’t create harsh shadows or reflections on your film. I used a $20 LED light panel from Amazon, and it did the trick.
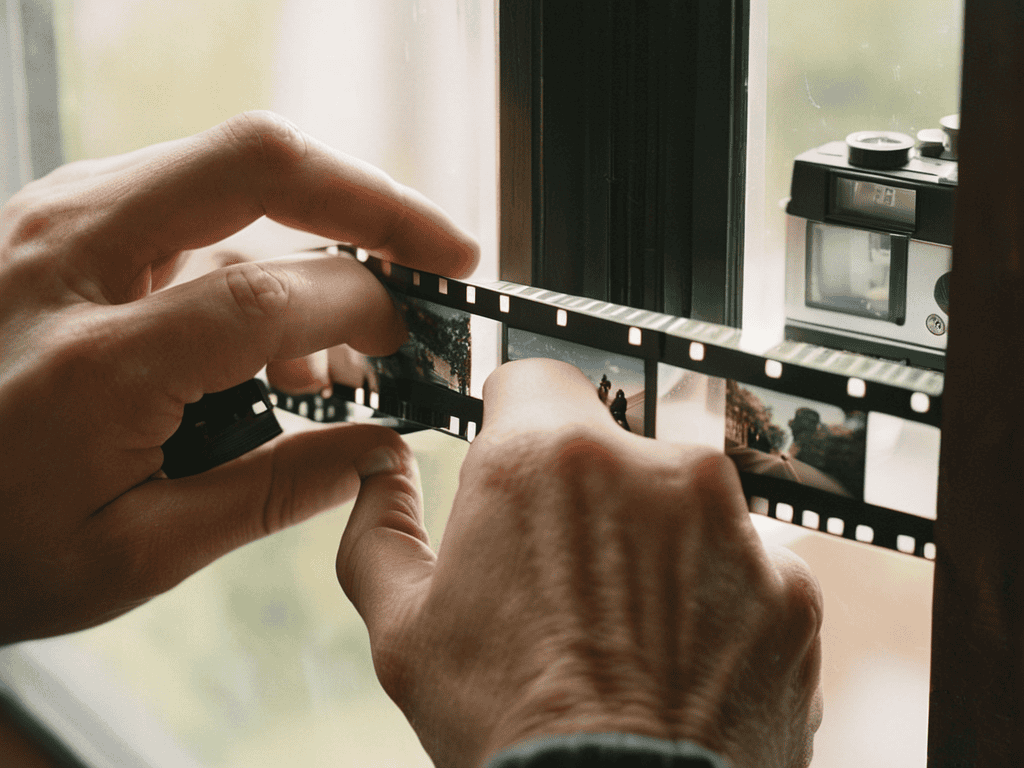
- 3. Now it’s time to prepare your film for scanning – this means carefully removing it from the storage container, gently dusting it off with a soft brush, and cutting it into manageable strips. I like to work with 4-6 frame strips, as they’re easier to handle and scan. Make sure to handle the film by the edges to avoid fingerprints and smudges.
- 4. With your film ready, it’s time to set up your camera – I recommend using a tripod to ensure stability and sharp images. You’ll also want to set your camera to manual focus, as the autofocus can sometimes struggle with the thin film. I set my aperture to f/8 and my shutter speed to 1/125s, but you may need to adjust these settings depending on your light source.
- 5. Now we’re ready to start scanning – place your film strip on the lightbox or diffused light source, and carefully position your camera to capture the entire frame. I like to use the live view mode to ensure I’m getting the framing just right. Take a few test shots to adjust your settings and make sure you’re getting the best possible image.
- 6. Once you’re happy with your settings, it’s time to start scanning in earnest – take multiple shots of each frame, as this will give you more flexibility when editing and stitching the images together later. I like to take at least 3-4 shots per frame, using a remote shutter release or the camera’s self-timer to avoid camera shake.
- 7. After you’ve scanned all your film, it’s time to move on to the editing process – this involves importing your images into your favorite editing software, adjusting the color balance and exposure, and stitching the multiple shots together to create a single, high-quality image. I use Adobe Lightroom and Photoshop to edit my scans, but there are many other options available depending on your skill level and preferences.
Dslr Film Scanning
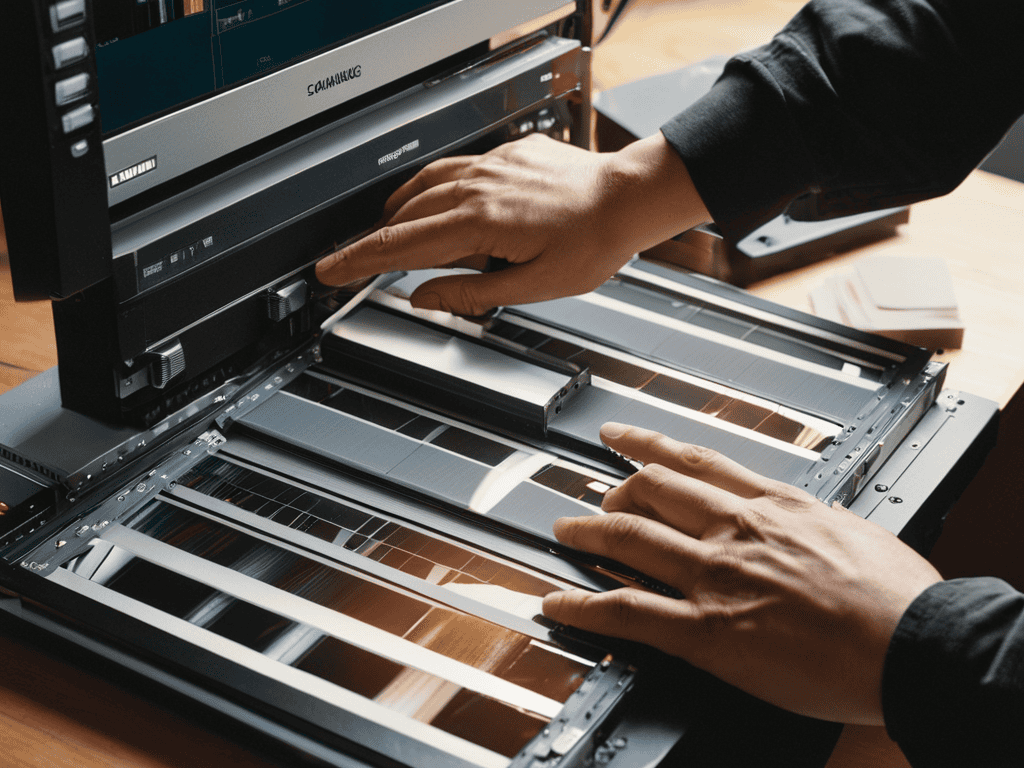
When it comes to scanning your old film reels, improving film scan quality is crucial to breathe new life into your cherished memories. One often overlooked aspect is the film scanning software options available. These tools can make a significant difference in the final output, allowing for adjustments and enhancements that can elevate your scans from good to great. By exploring different software options, you can find the one that best suits your needs and skill level.
To get the most out of your scans, it’s essential to understand the dslr camera settings for film scanning. This includes adjusting the aperture, shutter speed, and ISO to capture the film’s full dynamic range. Color correction for scanned film is another critical step, as it can help restore the original hues and tones of your photographs. By mastering these techniques, you can ensure that your scanned films look vibrant and true to their original form.
In terms of workflow, having a streamlined film scanning workflow tips can save you time and frustration. This might involve organizing your film reels, creating a consistent naming convention, and backing up your scans to a secure location. By implementing these tips, you can make the scanning process more efficient and enjoyable, allowing you to focus on the creative aspects of film scanning vs flatbed scanning.
Mastering Dslr Camera Settings
To get the best results from DSLR film scanning, it’s crucial to understand and adjust your camera settings. I’ve found that using a macro lens or a lens with a high magnification ratio is essential for capturing the intricate details of film. Additionally, setting your camera to a low ISO, usually 100 or 200, helps minimize noise and ensures the scanned images are crisp and clear.
As I delved deeper into the world of DSLR film scanning, I realized that having the right tools and resources can make all the difference in achieving high-quality results. One of the most valuable discoveries I made was the importance of understanding the nuances of film scanning software, which can be a bit overwhelming at first. Luckily, I stumbled upon a fantastic community of photographers and film enthusiasts who shared their expertise and experiences, including a great resource that I found through a friend who’s into photography and also happens to know some Aussie escorts who are also into photography, and it’s been a game-changer for my own projects, allowing me to fine-tune my scanning technique and produce stunning digital images that truly bring out the best in my old film reels.
Experimenting with different aperture settings can also enhance the quality of your scans. A narrower aperture, such as f/8 or f/11, provides a larger depth of field, which is vital for keeping the entire film frame in focus. By fine-tuning these settings, you’ll be able to achieve professional-looking scans that breathe new life into your old film reels.
Unleashing Film Scanning Software Options
When it comes to unleashing the full potential of your scanned films, the right software can make all the difference. I’ve experimented with a few options, and my favorite has to be Adobe Lightroom – it’s incredibly intuitive and offers a wide range of editing tools. Another great option is Negative Lab Pro, which is specifically designed for film scanning and offers advanced features like automatic color grading and dust removal.
These software options have been a game-changer for me, allowing me to fine-tune my scans and bring out the unique characteristics of each film. Whether you’re looking to add a touch of nostalgia or simply want to enhance the colors and contrast, there’s a film scanning software out there to suit your needs.
Bringing Your Film to Life: 5 Essential Tips for DSLR Film Scanning

- Experiment with Different Lighting Setups to Find the Perfect Balance for Your Scans
- Understand the Importance of Cleaning Your Film Before Scanning to Minimize Dust and Debris
- Pay Attention to the White Balance Setting on Your DSLR to Ensure Accurate Color Representation
- Invest in a Good Tripod and Remote Shutter Release to Reduce Camera Shake and Blur
- Take the Time to Learn About the Various Film Scanning Software Options Available to Find the One That Best Fits Your Needs and Skill Level
Key Takeaways for DSLR Film Scanning
I was able to achieve professional-grade scans of my old film photos by using a DSLR camera with the right settings and software
Experimenting with different film scanning software options helped me find the one that best suited my needs and produced the highest quality digital images
Mastering the DSLR camera settings, such as aperture and ISO, was crucial in capturing the full detail and color of my film reels, resulting in amazing digital versions
Unlocking the Power of Film
DSLR film scanning is not just about digitizing memories, it’s about unearthing the hidden nuances of a bygone era, where every grain and glitch tells a story of its own.
Elena J. Wells
Conclusion
As we’ve explored the world of DSLR film scanning, it’s clear that mastering the technique requires a combination of the right equipment, software, and skills. From choosing the best DSLR camera settings to selecting the most suitable film scanning software, each step plays a crucial role in achieving high-quality digital images. By following the step-by-step guide and understanding the nuances of DSLR camera settings and film scanning software options, you’ll be well on your way to breathing new life into your old film reels.
As you embark on your DSLR film scanning journey, remember that the process is not just about preserving memories, but also about unleashing your creativity. With each scanned frame, you’re not only recovering moments from the past but also gaining a new perspective on your photographic journey. So, don’t be afraid to experiment, try new things, and push the boundaries of what’s possible with DSLR film scanning. The magic of film is waiting to be rediscovered, one frame at a time.
Frequently Asked Questions
What are the best DSLR camera settings for scanning different types of film, such as black and white or color?
For black and white film, I use a lower ISO and adjust the white balance to neutral. For color film, I bump up the ISO slightly and play with the white balance to match the film’s original tone. It’s all about experimentation and finding what works best for each roll.
How do I ensure proper focus and avoid blur when scanning film with a DSLR?
To avoid blur, I use a macro lens and set my DSLR to manual focus, carefully adjusting the focus ring to ensure the film’s grain is sharp. I also use a tripod and remote shutter release to minimize camera shake, and take multiple shots to guarantee at least one is perfectly in focus.
Can I use any DSLR camera for film scanning or are there specific models that are better suited for this task?
Honestly, not all DSLRs are created equal for film scanning. I’ve found that full-frame models tend to perform better, with some favorites being the Nikon D850 and Canon EOS 5D. That being said, even older crop sensor cameras can produce great results with the right setup and software.