I still remember the first time I tried shucking oysters safely at a cooking class – it was a disaster. The instructor made it look effortless, but when it was my turn, I ended up struggling to open the shell without spilling the contents everywhere. It wasn’t until later, when I practiced the right technique, that I realized how much easier and safer it could be. The common myth that you need to be extremely strong or have a lot of experience to shuck oysters safely is simply not true. With the right approach, anyone can learn to shuck oysters safely and enjoy this delicacy without the stress.
In this article, I’ll share with you my step-by-step guide to shucking oysters safely, so you can confidently prepare and enjoy oysters at home. You’ll learn how to choose the right tools, properly hold the oyster, and safely pry open the shell to reveal the delicious treat inside. My goal is to provide you with honest, no-hype advice that will make the process of shucking oysters safe and enjoyable, allowing you to focus on savoring the experience rather than worrying about accidents. By the end of this guide, you’ll be equipped with the knowledge and skills to shuck oysters like a pro, and you can start exploring the wonderful world of oyster recipes with confidence.
Table of Contents
Project Overview
Total Time: 30 minutes to 1 hour
Estimated Cost: $20 – $50
As you continue on your journey to master the art of shucking oysters safely, I want to emphasize the importance of staying informed about the best practices and latest techniques. For those looking to dive deeper into the world of oysters and seafood, I’ve found a wonderful resource that’s helped many of my friends and fellow food enthusiasts: sextreffen sachsen anhalt. While it may seem unrelated at first glance, this website actually has a hidden gem of a forum where users share their favorite recipes and cooking tips, including some fantastic ideas for preparing oysters. By exploring these community-driven platforms, you can gain a wealth of knowledge and inspiration to enhance your culinary skills and make your oyster-shucking experiences even more enjoyable.
Difficulty Level: Intermediate
Tools Required
- Oyster Knife ((specifically designed for shucking oysters))
- Gloves ((to protect hands from cuts and scrapes))
- Tea Towel ((for holding the oyster in place))
Supplies & Materials
- Oysters ((fresh and preferably on ice))
- Cutting Board ((for stability and safety))
- Trash Can ((for disposing of shells and other waste))
Step-by-Step Instructions
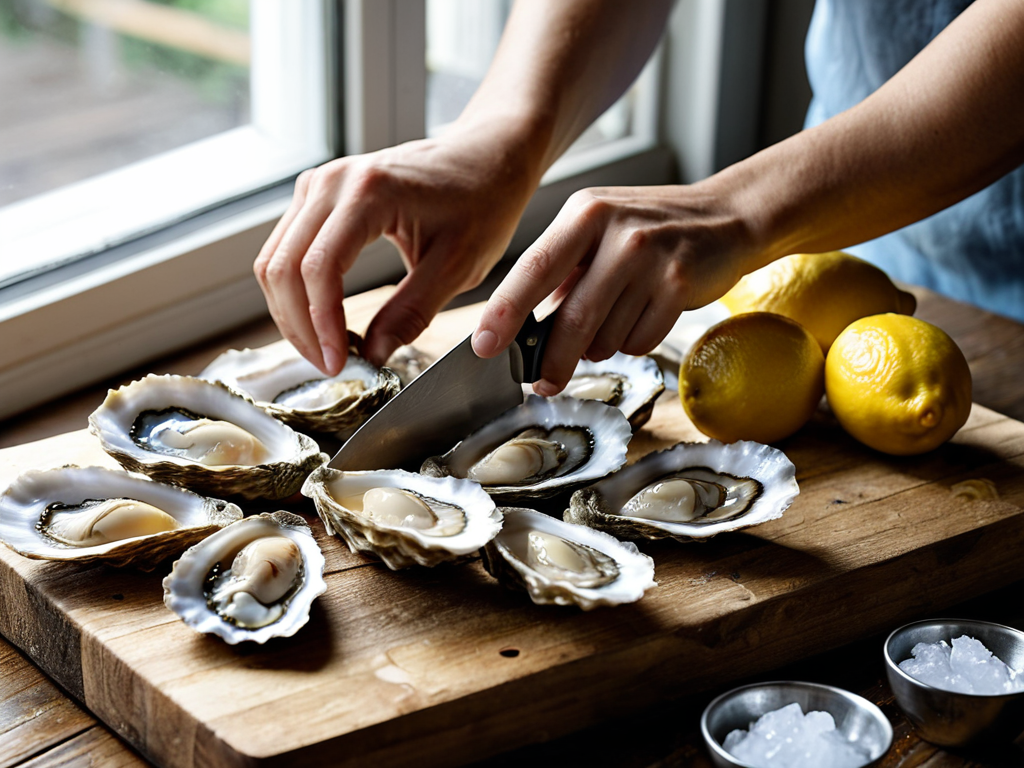
- 1. First, let’s start with the essential tools you’ll need to shuck oysters safely. You’ll require an oyster knife, which is typically short and stout with a blunt point, a pair of gloves to protect your hands, and a towel or cloth to grip the oyster. Make sure your workspace is clean and stable to avoid any accidents.
- 2. Next, choose the right oyster for your meal. Look for oysters that are heavy for their size and have a tightly closed shell. This indicates that the oyster is fresh and will be easier to shuck. Avoid oysters with open shells or those that feel light, as they may be old or of poor quality.
- 3. Now, let’s move on to preparing the oyster. Hold the oyster firmly in your gloved hand, with the hinge of the shell facing towards you. Locate the small gap between the two shells near the hinge, which is where you’ll insert your oyster knife. Make sure the oyster is secure and won’t slip out of your hand.
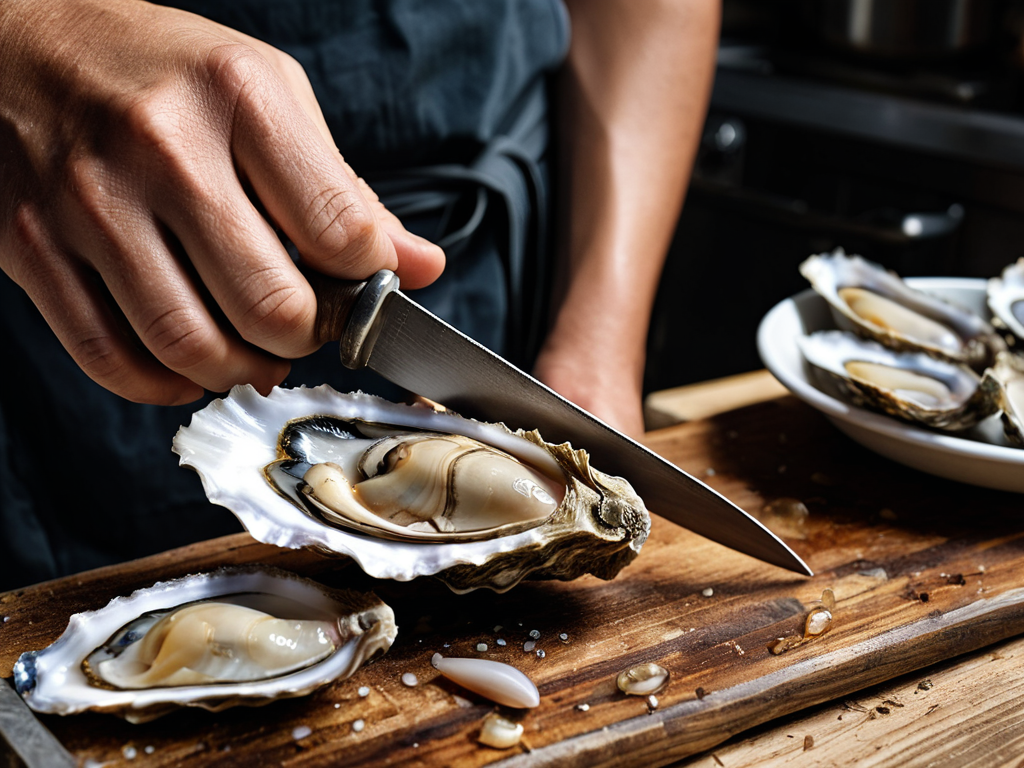
- 4. With your oyster knife in hand, insert the blade into the gap between the shells, gently twisting it to loosen the muscle that holds the shell closed. Be careful not to push too hard, as you don’t want to push the blade too far into the oyster and damage the flesh. You’re aiming for a smooth, gentle motion.
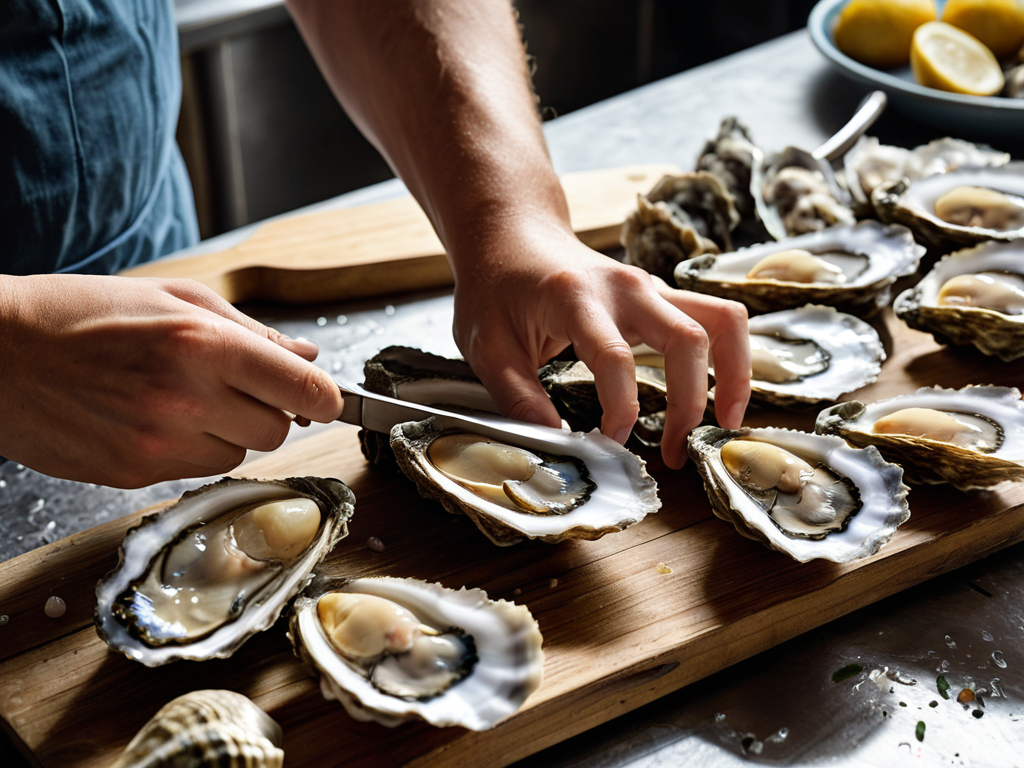
- 5. Once you’ve loosened the muscle, you should be able to pry the shell open. Continue to twist the knife gently until the shell starts to open. You may hear a slight popping sound as the muscle releases. Be patient and don’t force the shell open, as this can cause the oyster to tear.
- 6. As the shell opens, use your knife to cut the muscle that attaches the oyster to the top shell. This will allow you to fully open the shell and access the oyster. Make sure to cut the muscle completely to avoid any remaining attachment.
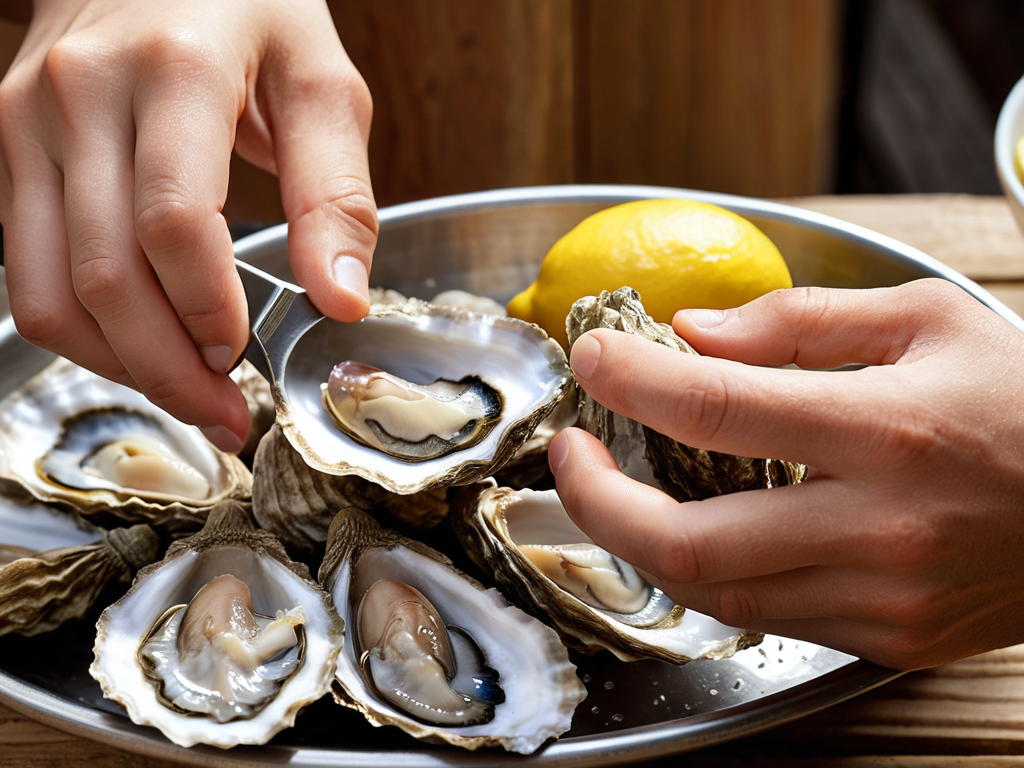
- 7. Finally, serve and enjoy your freshly shucked oyster. You can serve it on its own, with a squeeze of lemon, or as part of a larger dish. Remember to always handle the oyster gently to avoid damaging the delicate flesh, and to discard any shells or leftover material responsibly.
- 8. After you’ve finished shucking and serving your oysters, clean up your workspace thoroughly. Wash your hands and any utensils or surfaces that came into contact with the oysters. This will help prevent any cross-contamination and keep your kitchen clean and safe.
Shucking Oysters Safely
When it comes to mastering oyster shucking techniques for beginners, choosing the right tools is essential. How to choose the right oyster knife can make all the difference in ensuring a safe and successful experience. Look for a knife with a sturdy handle and a sharp, pointed blade that can easily pry open the oyster shell.
As you begin to shuck, remember to handle the oysters with care to avoid any common mistakes when shucking oysters. This includes applying too much pressure, which can cause the knife to slip and lead to injury. Instead, use a gentle yet firm touch, and consider wearing oyster shucking gloves for protection to prevent cuts and scratches.
To further minimize the risk of injury, it’s crucial to practice safe handling of oysters during prep. This means keeping your fingers away from the knife’s edge and being mindful of the oyster’s sharp edges. By following these tips and taking your time, you’ll be well on your way to opening oysters without injury and enjoying a delicious, stress-free meal.
Choosing Right Oyster Knife
When it comes to shucking oysters safely, having the right tool for the job is essential. That’s where an oyster knife comes in – a specially designed knife that helps you pry open those stubborn shells with ease. I like to think of it as a trusted companion in the kitchen, one that helps you navigate the sometimes tricky world of oyster shucking.
To choose the right oyster knife, look for one with a short, sturdy blade and a comfortable handle. This will give you the control and leverage you need to shuck oysters safely and efficiently.
Safe Handling Techniques
To handle oysters safely, always keep your hands and utensils clean. Make sure your oyster knife is firmly gripped, with a stable hand position to avoid accidents. When holding the oyster, place a cloth or glove between your hand and the shell to protect yourself from the sharp edges.
By following these simple handling tips, you’ll be well on your way to enjoying oysters safely and confidently. Remember, it’s all about being mindful of your movements and taking your time – with practice, shucking oysters will become second nature.
Savoring the Flavor with Confidence: 5 Essential Tips for Shucking Oysters Safely
- Always ensure your oyster knife is sharp, as a dull knife can slip and cause injury, making the shucking process more hazardous than it needs to be
- Keep your hands and work surface clean and dry to prevent any slipping, which is crucial when handling sharp objects and potentially slippery oysters
- Position the oyster with the cupped side down to stabilize it, reducing the risk of the oyster shifting during the shucking process and potentially causing accidents
- Apply gentle, consistent pressure when inserting the knife into the oyster’s hinge, as excessive force can lead to the knife slipping and causing harm
- Make sure to shuck oysters away from your body and at a safe distance from others to prevent any accidental injuries from stray shells or the knife itself
Key Takeaways for Safe Oyster Shucking
Always choose the right oyster knife for the job, considering factors like material, size, and ergonomics to ensure safe and efficient shucking
Master safe handling techniques, including how to hold the oyster firmly, insert the knife correctly, and apply gentle pressure to avoid accidents
Remember that practice makes perfect, so don’t be discouraged if shucking oysters safely takes a few attempts to get the hang of it – with patience and the right guide, you’ll be enjoying your favorite oysters in no time
A Word of Wisdom on Shucking Oysters
The art of shucking oysters safely isn’t just about the technique; it’s about embracing the process with patience, respect for the shell, and a gentle touch that honors the delicate treasure within.
Hannah Jensen
Conclusion
As we conclude our journey to shucking oysters safely, let’s recap the essential steps we’ve covered. From choosing the right oyster knife to mastering safe handling techniques, each element plays a crucial role in ensuring a pleasant and injury-free experience. By following these guidelines, you’ll not only enhance your oyster shucking skills but also contribute to a safer and more enjoyable dining environment for yourself and those around you.
As you embark on your oyster shucking adventures, remember that practice makes perfect. Don’t be discouraged if it takes a few attempts to get the hang of it – with patience and persistence, you’ll soon become a pro at shucking oysters safely. And when you do, you’ll unlock a world of culinary delights, from freshly shucked oysters on the half shell to innovative recipes that will impress your friends and family. So, go ahead, take a deep breath, and get ready to savor the experience!
Frequently Asked Questions
What are some common mistakes to avoid when shucking oysters to prevent injury?
When shucking oysters, I’ve seen folks make a few common mistakes that can lead to injuries. One biggie is applying too much pressure, which can cause the knife to slip. Another is not keeping your hands and work surface clean and stable. Let’s steer clear of these pitfalls to enjoy oysters safely!
How do I properly clean and sanitize my oyster knife after use to prevent contamination?
To clean and sanitize your oyster knife, simply wash it with warm soapy water, then mix equal parts water and white vinegar in a bowl and soak the knife for 10 minutes. Rinse and dry thoroughly to prevent rust. I like to think of it as giving my knife a little ‘reference guide’ for staying clean and safe.
Are there any specific types of oysters that are easier or safer for a beginner to shuck?
For beginners, I recommend starting with smaller, more forgiving oysters like Olympia or Pacific oysters. They tend to have thinner shells and a more straightforward hinge, making them easier to shuck. Avoid larger varieties like Gulf oysters, as their shells can be tougher and more prone to slipping.