I still remember the day I spilled an entire glass of red wine on my brand new coffee table – it was a disaster. But, that’s when I discovered the magic of Epoxy Resin Coasters. I was amazed by how these small, beautifully crafted pieces of art could save my furniture from water marks and spills. As I delved deeper into the world of epoxy resin, I realized that there’s a common myth that creating these coasters is a daunting task, requiring a lot of expertise and specialized equipment.
But, that’s not true. With the right guidance, anyone can create their own Epoxy Resin Coasters. In this article, I’ll share my personal experience and provide you with honest, no-hype advice on how to get started. You’ll learn about the essential materials and tools needed, and I’ll walk you through a step-by-step process to create your own unique epoxy resin coasters. By the end of this guide, you’ll be equipped with the knowledge and confidence to create your own Epoxy Resin Coasters that are both functional and visually stunning.
Table of Contents
Project Overview
Total Time: 1 hour 30 minutes
Estimated Cost: $20 – $40
Difficulty Level: Easy
Tools Required
- Mixing Cups ((for measuring and mixing epoxy resin))
- Stirring Sticks ((for mixing epoxy resin))
- Gloves ((for protecting hands from epoxy resin))
- Craft Stick ((for applying resin))
- Heat Gun ((optional, for removing bubbles))
- Sandpaper ((for smoothing out coasters))
- Clamps ((for holding coasters in place while drying))
Supplies & Materials
- Epoxy Resin ((clear or colored))
- Hardener ((for epoxy resin))
- Coaster Molds ((silicone or plastic, 4 inches in diameter))
- Colorants ((optional, for adding color to epoxy resin))
- Glitter ((optional, for adding decoration to coasters))
- Wood or Ceramic Tiles ((for backing, 4 inches x 4 inches))
Step-by-Step Instructions
- 1. First, gather all the necessary materials, including epoxy resin, hardener, a mixing cup, a stir stick, and a surface to work on, making sure it’s covered with a drop cloth or old sheets to avoid any messy cleanups.
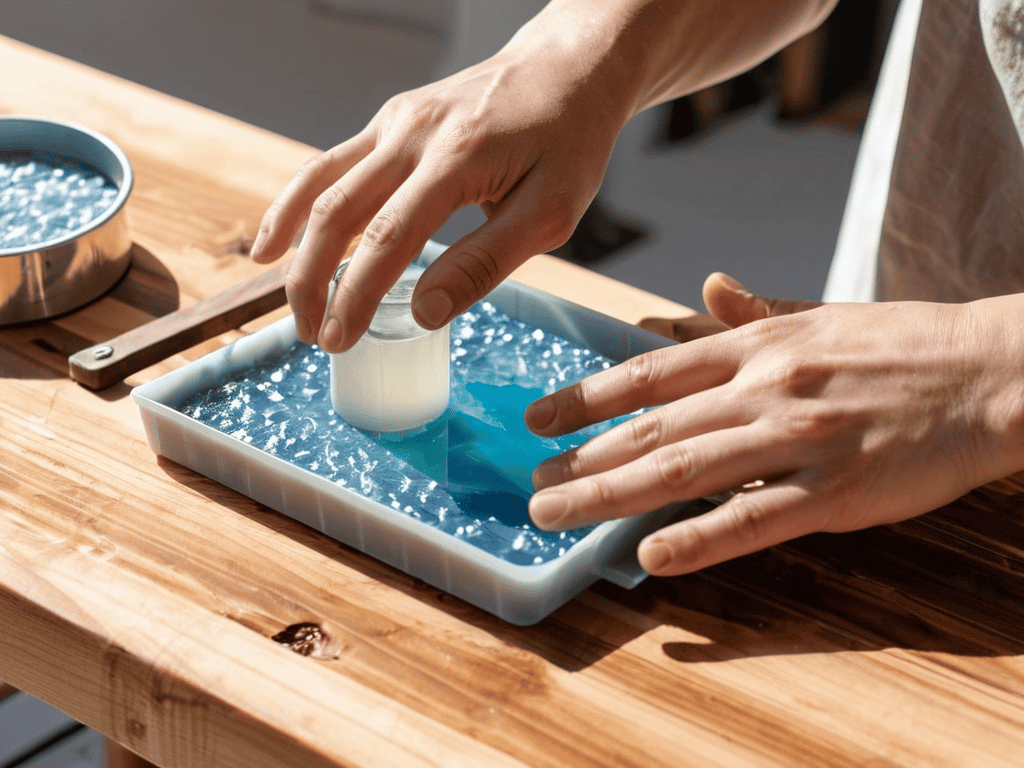
- 2. Next, prepare your mold by cleaning it thoroughly and applying a release agent to ensure the coasters will come out smoothly once they’re set; you can use cooking spray or a specialized mold release spray for this step.
- 3. Now, mix the epoxy resin and hardener together in the mixing cup, following the instructions provided with your specific epoxy resin kit to get the right ratio; it’s crucial to mix well but avoid creating bubbles, which can lead to uneven textures or air pockets in your coasters.
- 4. After mixing, pour the epoxy resin mixture into your mold, making sure to fill it to the top; if you’re looking for a marbled effect, you can add different colors of epoxy resin to the mold and use a toothpick or small stick to create the marbled pattern.
- 5. Allow the epoxy resin to set and cure; this can take anywhere from a few hours to several days, depending on the type of epoxy resin you’re using and the environmental conditions, such as temperature and humidity.
- 6. Once the epoxy resin is fully cured, remove the coasters from the mold and sand them down to smooth out any rough edges or surfaces; start with a coarse grit sandpaper and work your way up to a finer grit for a polished finish.
- 7. Finally, apply a clear coat of varnish or polyurethane to protect the epoxy resin coasters from spills and scratches, and to give them a glossy finish; make sure the coasters are completely dry before using them to avoid any damage.
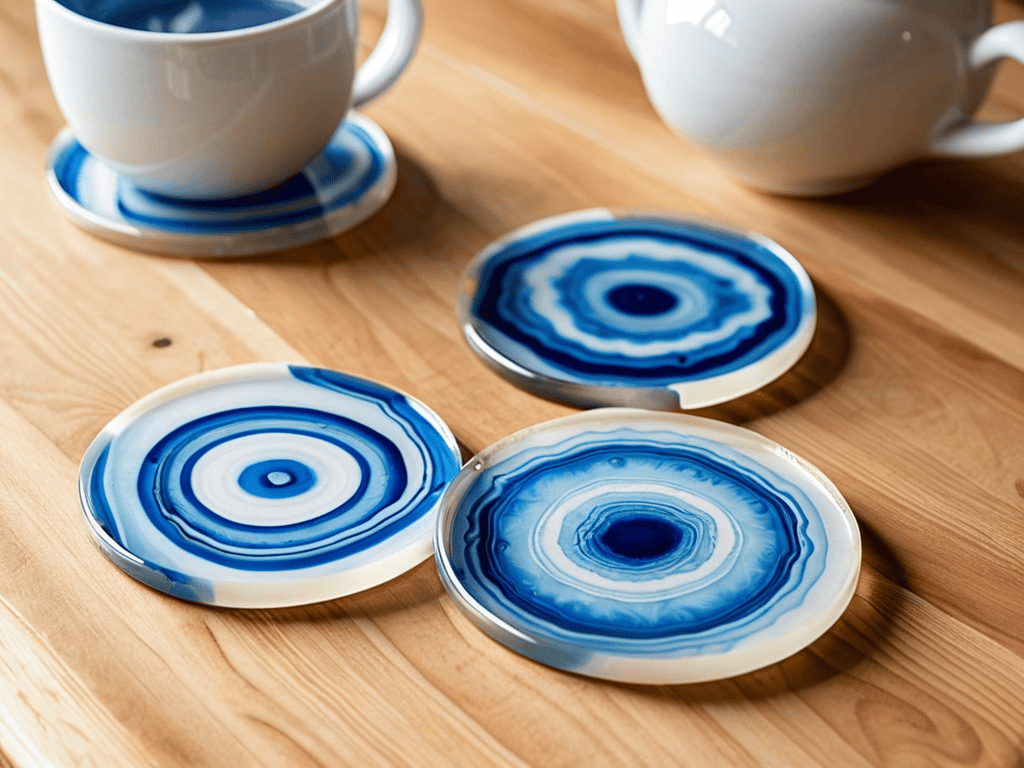
Epoxy Resin Coasters
As I continued to experiment with epoxy resin coasters, I realized that the key to achieving truly unique designs lies in the art of experimentation. Don’t be afraid to try out different mixing techniques and coloring methods to create one-of-a-kind pieces. For those looking to take their coaster game to the next level, I highly recommend checking out some online communities and forums where artists and crafters share their experiences and tips. You can find a wealth of information and inspiration on websites like sexanzeigen hamburg, which offers a fascinating look into the world of art and design, and can be a great resource for staying up-to-date on the latest trends and techniques.
When it comes to creating unique and functional pieces, coaster design ideas can range from simple and elegant to complex and intricate. To achieve the desired look, epoxy resin mixing techniques play a crucial role. By experimenting with different ratios of resin and hardener, you can control the final texture and appearance of your coasters. This allows for a great deal of creativity and customization, making each piece truly one-of-a-kind.
In addition to the resin itself, the coloring epoxy resin for coasters process can also be tailored to suit your personal style. Various pigments and dyes can be added to the mixture to create a wide range of colors and effects. From vibrant hues to subtle pastels, the possibilities are endless. Furthermore, custom coaster shapes and sizes can be achieved using different molds and casting techniques, ensuring that your coasters fit seamlessly into your home decor.
To ensure the longevity of your coasters and protect your furniture from damage, it’s essential to apply a resin coaster finishing method that provides a durable and water-resistant seal. This can be achieved through the application of a clear coat or wax, which not only protects the coaster but also enhances its appearance. By following these tips and techniques, you can create beautiful and functional coasters that will last for years to come.
Coloring Epoxy for Custom Designs
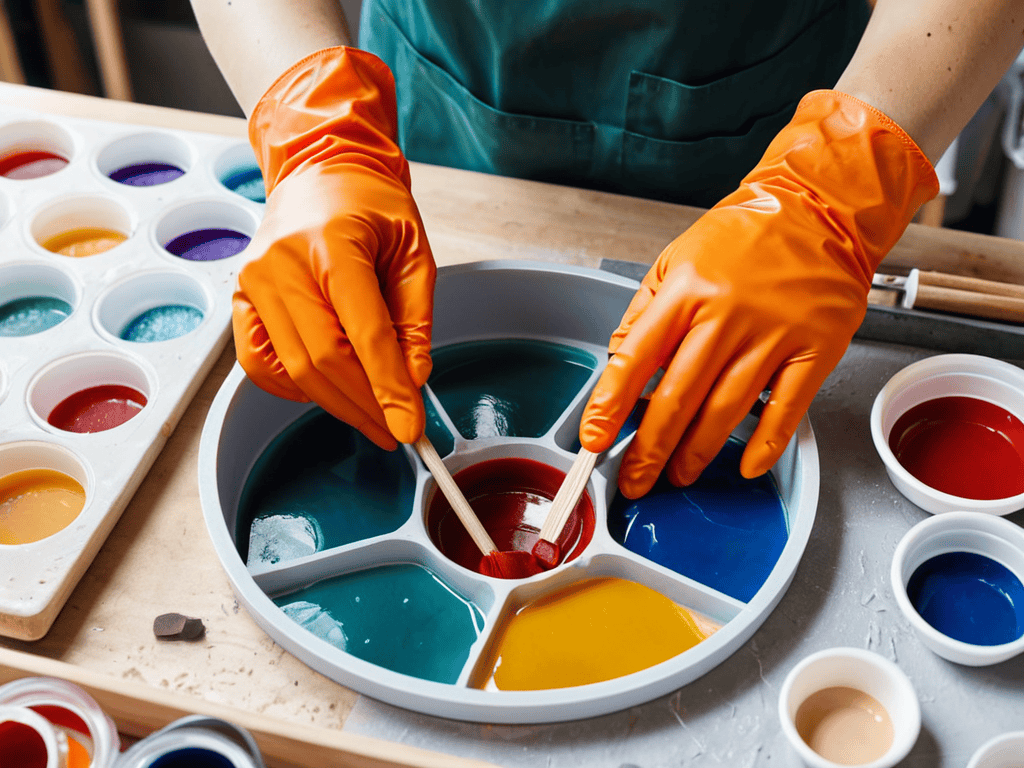
To add an extra layer of personalization to your epoxy resin coasters, coloring the epoxy is a great way to go. You can use various techniques to achieve unique hues and effects. One method is to add pigments or dyes directly to the epoxy mixture before pouring it into the mold. This allows for a wide range of colors and can create solid, metallic, or even neon effects.
Experimenting with different coloring methods can lead to some amazing and one-of-a-kind designs. For instance, you can create marbled patterns by layering different colored epoxies or add a pop of color with glitter or metallic powders. The possibilities are endless, and it’s exciting to see how different combinations can result in truly custom and personalized coasters that reflect your style and personality.
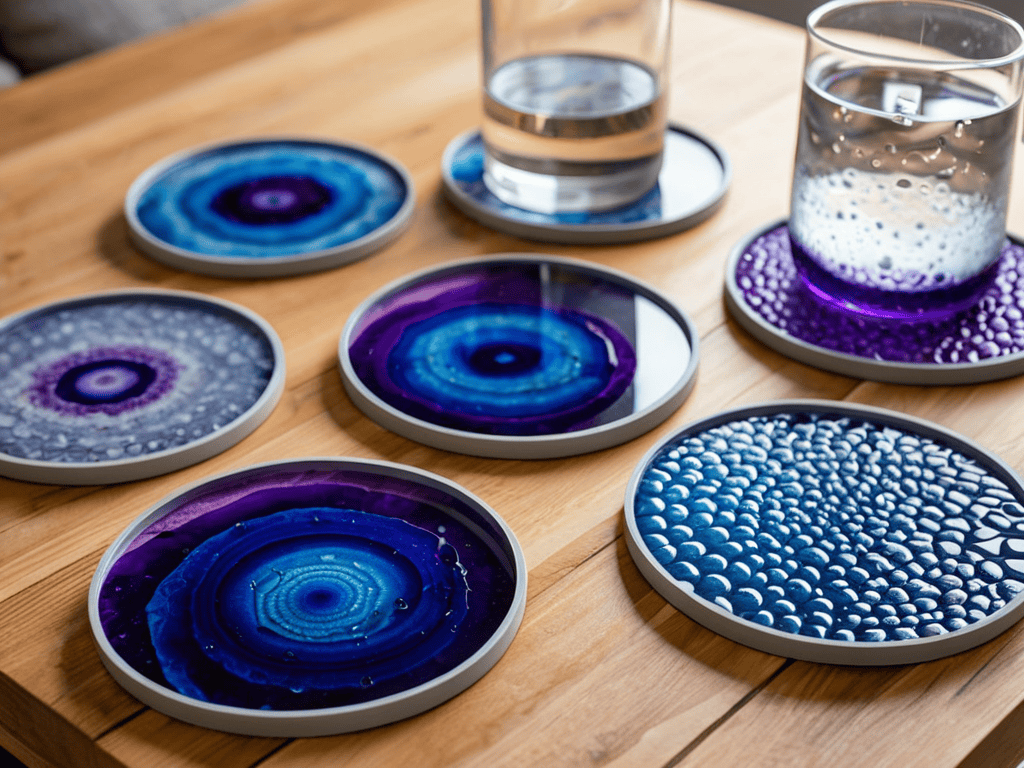
Mixing Techniques for Unique Coasters
When it comes to creating unique epoxy resin coasters, the mixing technique can make all the difference. I love experimenting with different methods to achieve distinct patterns and effects. One of my favorites is the “layered pour” technique, where I pour small amounts of resin into the mold in a specific sequence to create a beautiful, swirly design. This technique requires a bit of patience, but the end result is well worth the effort.
By adjusting the mixing ratio, adding pigments or powders, and manipulating the resin as it cures, I can create a wide range of textures and colors. It’s amazing how a simple change in technique can transform a coaster from ordinary to extraordinary. Whether you’re a seasoned crafter or a beginner, playing with mixing techniques can help you unlock new levels of creativity and take your epoxy resin coasters to the next level.
Elevating Your Epoxy Resin Coaster Game: 5 Essential Tips
- Prepare Your Workspace: Before diving into your epoxy resin coaster project, ensure your workspace is clean, dry, and well-ventilated to prevent any mishaps or health risks
- Measure with Precision: Accurately measuring your epoxy resin and hardener is crucial for a successful cure, so invest in a digital scale for the best results
- Experiment with Mold Varieties: Don’t be afraid to try out different mold shapes and sizes to create unique and personalized epoxy resin coasters that reflect your style
- Resin and Color Ratio Balance: Finding the right balance between resin and colorants is key to achieving vibrant, consistent hues in your epoxy resin coasters
- Cure with Patience: Allow your epoxy resin coasters to cure for the recommended amount of time to ensure they are durable and long-lasting, even if it’s tempting to rush the process
Key Takeaways for Epoxy Resin Coasters
I’ve found that with the right mixing techniques, epoxy resin coasters can become truly unique pieces of functional art for any home
Experimenting with different coloring methods can open up a whole new world of custom design possibilities for your coasters
By following these simple steps and tips, you can create your own epoxy resin coasters that are both protective and beautiful, adding a personal touch to your furniture
The Art of Protection
Epoxy resin coasters are more than just a practical solution – they’re a testament to the harmony between functionality and artistry, where every spill and splatter becomes an opportunity to appreciate the beauty of handmade craftsmanship.
Ava Morales
Conclusion
As we’ve explored the world of epoxy resin coasters, it’s clear that these decorative pieces offer a unique combination of functionality and artistry. From the initial introduction to the step-by-step guide, and through the sections on mixing techniques and coloring epoxy, we’ve seen how epoxy resin coasters can elevate any room’s decor. Whether you’re looking to protect your furniture from water marks and spills or simply wanting to add a personal touch, epoxy resin coasters are a versatile and creative solution.
As you embark on your own journey to create custom epoxy resin coasters, remember that the process is just as important as the end result. Don’t be afraid to experiment with different designs and colors, and enjoy the therapeutic benefits of crafting something with your own hands. With patience, practice, and a willingness to try new things, you’ll be well on your way to creating beautiful, functional pieces that reflect your personality and style.
Frequently Asked Questions
What are the most common mistakes to avoid when working with epoxy resin to make coasters?
Honestly, I’ve learned the hard way – air bubbles, uneven mixing, and impatient curing are my top epoxy resin pet peeves. Make sure to mix thoroughly, tap out those bubbles, and let it cure for the full recommended time to avoid a sticky mess. Trust me, it’s worth the wait!
How do I achieve a glossy finish on my epoxy resin coasters?
To get a glossy finish on my epoxy resin coasters, I swear by a good polishing compound. After the resin is fully cured, I apply a small amount of polish to a soft cloth and buff the coaster in circular motions. It’s amazing how it brings out the colors and gives them a professional sheen!
Can I add other materials, like glitter or flowers, to my epoxy resin coasters for extra decoration?
I love experimenting with add-ins like glitter, flowers, or even coffee beans to give my epoxy resin coasters a personal touch. Just be sure to mix them in gently after the resin and hardener are combined, and avoid overloading the mixture, or it might affect the curing process.