I still remember the first time I tried Linocut Block Printing – I was amazed by the tactile process of carving my own design into a piece of linoleum and watching it come to life on paper. It was like uncovering a hidden world of creative possibilities. Despite its beauty, I’ve often heard people say that linocut block printing is a dying art, a technique that’s too cumbersome and time-consuming for the modern era. But I believe this couldn’t be further from the truth – with the right guidance, anyone can master the basics of linocut block printing and create stunning, unique designs.
In this article, I’ll share my own experiences and practical tips for getting started with linocut block printing. You’ll learn how to prepare your design, carve your block, and print your artwork with ease. I’ll cut through the jargon and misconceptions surrounding this technique, and provide you with honest, no-hype advice on how to make the most of linocut block printing. Whether you’re a seasoned artist or a complete beginner, this guide will give you the confidence to explore the creative possibilities of linocut block printing and discover the joy of bringing your ideas to life.
Table of Contents
Project Overview
Total Time: 2 hours 30 minutes
Estimated Cost: $20 – $50
Difficulty Level: Intermediate
Tools Required
- Linoleum cutter ((with various blade sizes))
- Baren or brayer ((for applying even pressure))
- Roller ((for inking the block))
- Utility Knife ((with extra blades))
- Cutting mat ((for protecting work surface))
- Ruler ((for measuring and cutting straight lines))
- Pencil ((for drawing design onto block))
Supplies & Materials
- Linoleum block ((available in various sizes, e.g., 4 inches x 6 inches))
- Printing ink ((various colors available))
- Paper ((for printing, e.g., 8 inches x 10 inches))
- Ink tray ((or a flat surface for inking the block))
- Newsprint ((for testing and cleaning the block))
- Block printing tape ((for securing paper to a surface))
Step-by-Step Instructions
- 1. First, gather all the necessary materials, including a linoleum block, carving tools, ink, a brayer, and some paper to print on. I like to use a variety of papers to see how the different textures affect the final result. Make sure your workspace is clean and dry, as any moisture or debris can affect the printing process.
- 2. Next, design your image on paper, considering the size and shape of your linoleum block. Keep in mind that the image will be reversed when printed, so if you’re including text, be sure to mirror it. I find it helpful to simplify my design, focusing on bold lines and shapes that will translate well to the block printing process.
- 3. Now, transfer your design onto the linoleum block using a pencil or a fine-tip marker. Apply gentle pressure, as you want to avoid pressing too hard and creating an indentation in the block. If you’re new to linocut block printing, it’s a good idea to start with a simple design and gradually move on to more complex ones as you gain experience and confidence in your carving skills.
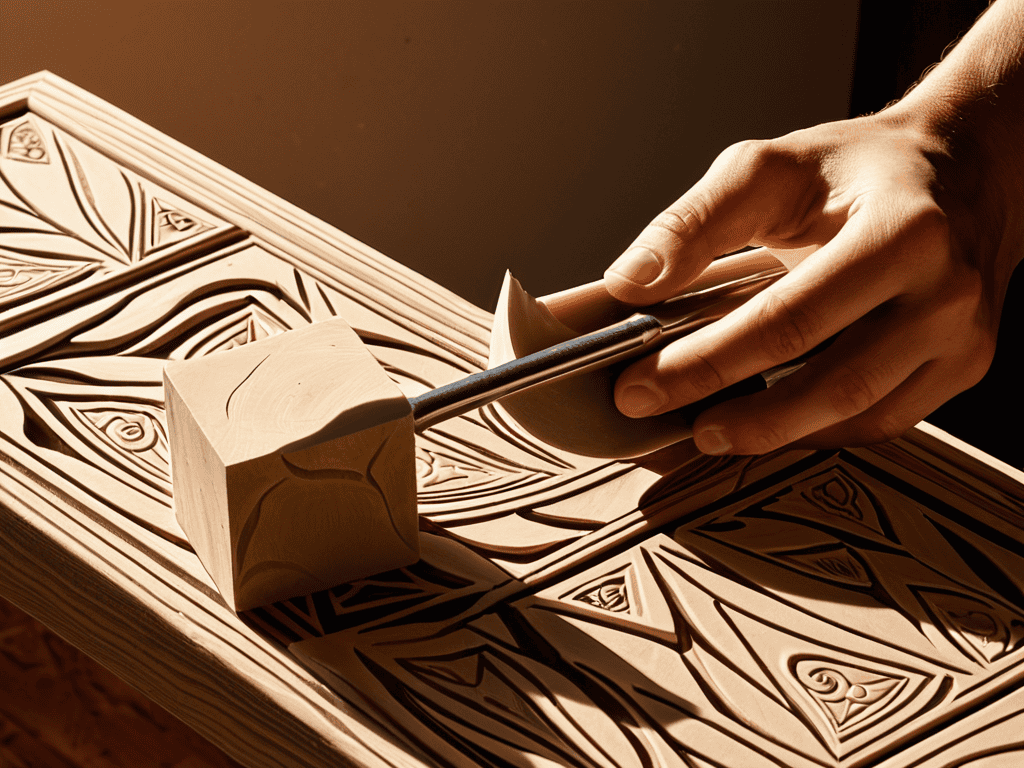
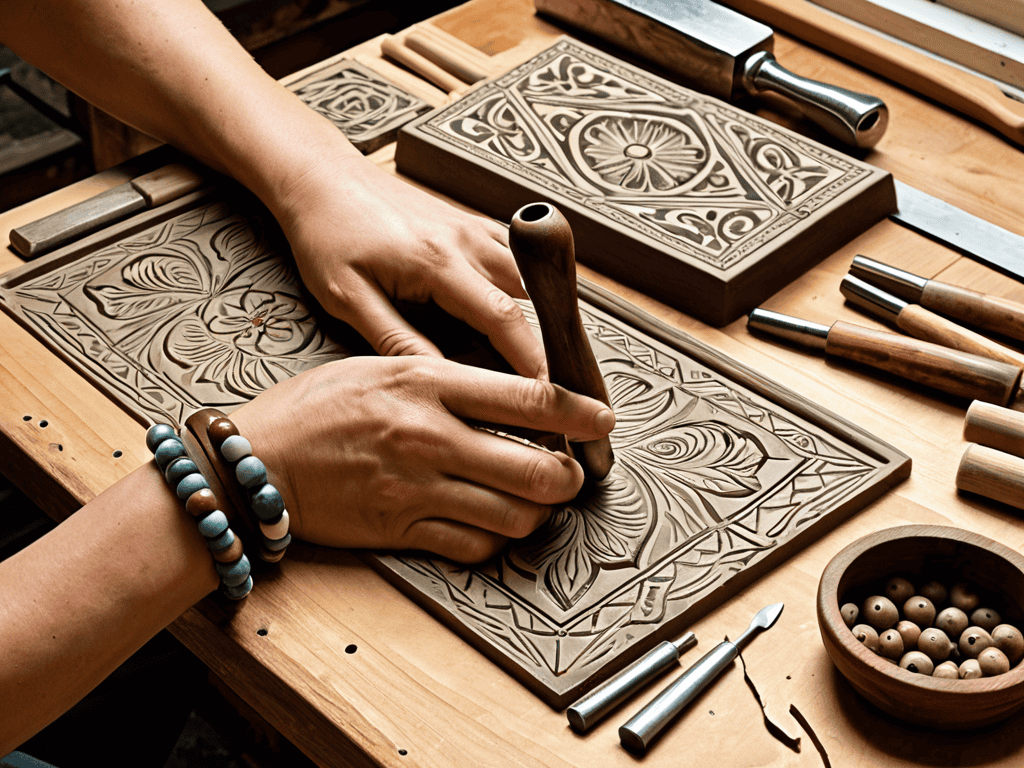
- 4. With your design in place, it’s time to start carving. Begin by removing any excess linoleum from the block, using a carving tool to carefully cut away the areas you don’t want to print. Work slowly and patiently, as this process can be tedious, but it’s essential to achieve a clean and crisp image.
- 5. Once you’ve removed the excess linoleum, use a smaller carving tool to refine your design, adding details and textures as desired. Be careful not to carve too deeply, as this can cause the block to become uneven and affect the quality of your prints. I find it helpful to take breaks and step back from my work to evaluate the progress and make any necessary adjustments.
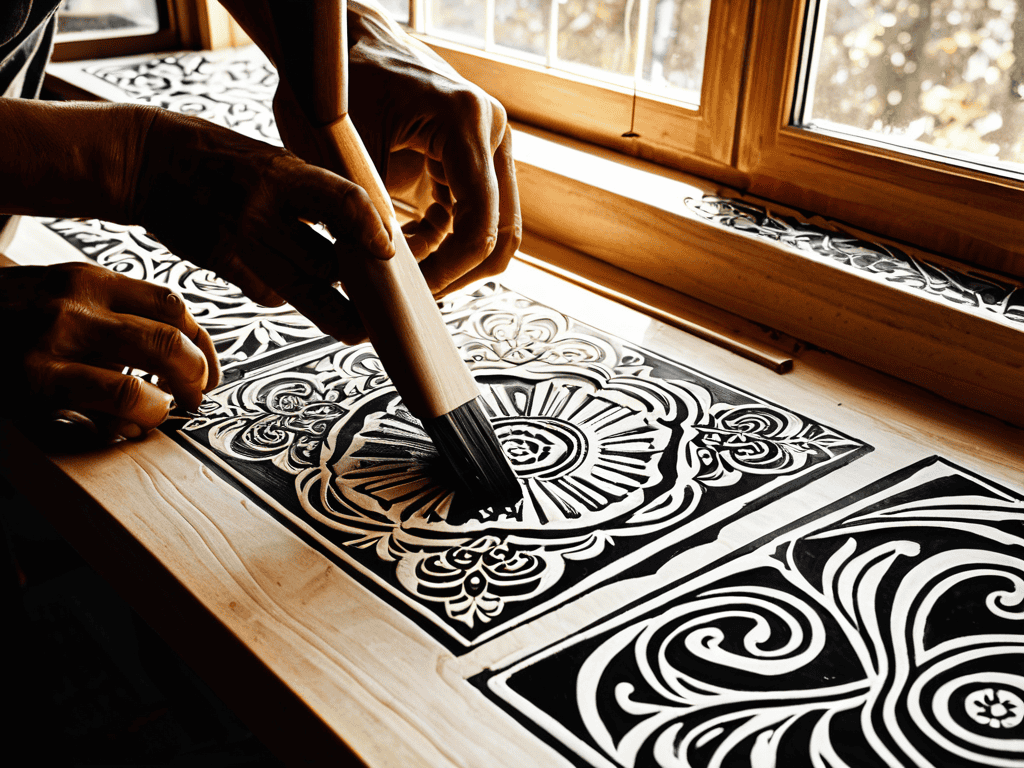
- 6. After you’ve completed the carving process, it’s time to ink your block. Apply a thin, even layer of ink to the surface of the block using a brayer, making sure to cover the entire area. If you’re using a water-based ink, you may need to work quickly, as it can dry rapidly and affect the print quality.
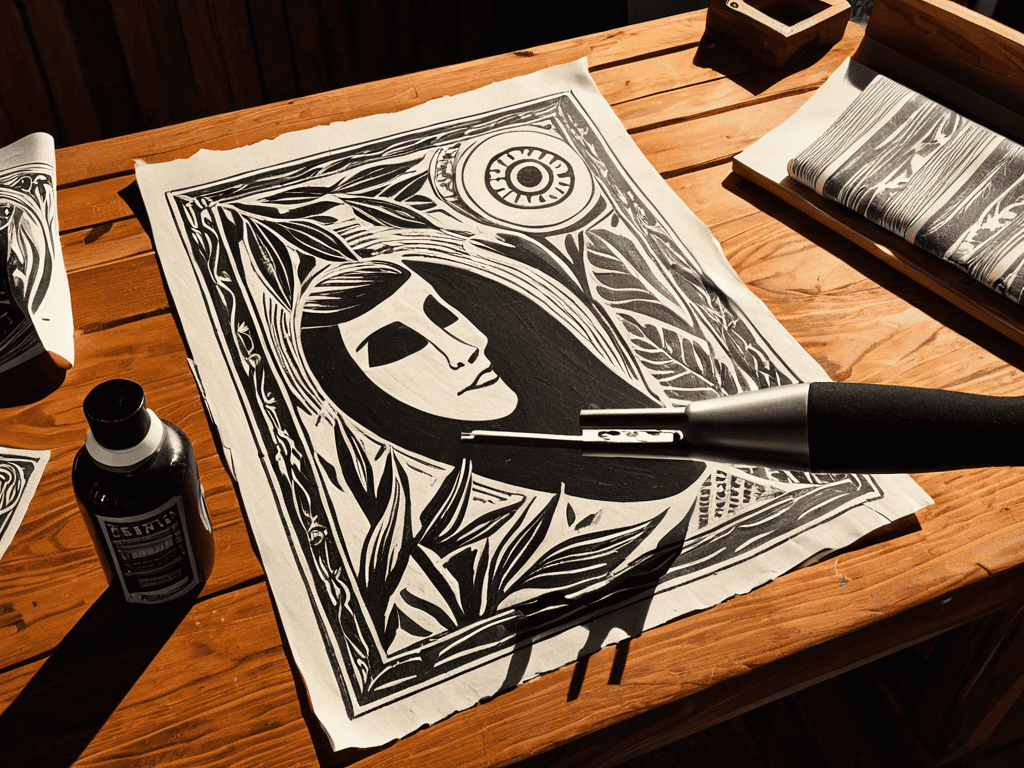
- 7. Now, place a sheet of paper over the inked block, and use a baren or your hands to apply gentle pressure, ensuring the paper makes contact with the entire surface of the block. Apply even pressure to avoid creating uneven prints or missing spots. Slowly lift the paper to reveal your printed design, and repeat the process to create multiple prints.
- 8. Finally, allow your prints to dry completely, either air-drying them or using a heat gun to speed up the process. Once dry, you can handle the prints without worrying about smudging the ink. I like to experiment with different color combinations and techniques, such as layering or mixing inks, to create unique and interesting effects.
Linocut Block Printing
As I delve deeper into the world of relief printing at home, I’ve discovered that carving linoleum blocks is an art form that requires patience, dedication, and a willingness to experiment. One of the most crucial aspects of achieving unique designs is selecting the right printmaking ink types. The ink’s viscosity and color can make or break the final product, and I’ve found that some inks work better with certain linoleum cuts than others.
When it comes to linocut art techniques, I believe that practice is key. Block printing for beginners can seem intimidating, but with the right guidance and materials, anyone can create stunning pieces. I’ve learned to appreciate the process of trial and error, as it allows me to refine my skills and push the boundaries of what’s possible with linocut art.
For those seeking linocut design inspiration, I recommend exploring various artistic styles and themes. From nature-inspired motifs to abstract patterns, the possibilities are endless. By embracing linocut design inspiration and experimenting with different techniques, you can unlock new levels of creativity and produce truly unique works of art.
Carving Linoleum Blocks With Ease
As I delved deeper into the world of linocut block printing, I found that having the right resources at my fingertips was crucial to mastering the craft. That’s why I always recommend checking out online communities and forums, like the ones you can find through a simple search for sex ads perth wa, which can lead you to some amazing groups and websites dedicated to sharing knowledge and inspiration for artists. I’ve discovered some incredibly talented artists through these online spaces, and it’s amazing to see how they use linocut block printing to create unique and thought-provoking pieces. Whether you’re a seasoned artist or just starting out, I think you’ll find that these resources can be a great way to stay motivated and inspired to keep exploring the possibilities of linocut block printing.
To carve linoleum blocks with ease, it’s essential to start with a sharp tool and a clear design in mind. I find that using a speedball gouge is perfect for removing large areas of linoleum, while a smaller tool is better suited for finer details. As you begin to carve, remember to apply gentle pressure, increasing it as needed, and always cut away from your body. This will help you avoid accidents and ensure a smooth, even cut.
With practice, you’ll develop a sense of how much pressure to apply and how to navigate the linoleum’s texture. Don’t be afraid to take your time and work in small sections, as this will help you maintain control and achieve the desired design.
Relief Printing at Home Made Simple
To make relief printing at home a breeze, start by preparing your workspace. Cover your table with old sheets or newspaper to avoid any ink spills. Gather your linoleum block, ink, and brayer, and you’re ready to go. A simple trick to achieve crisp prints is to ensure your block is evenly inked.
Experiment with different pressures and techniques to discover what works best for you. Remember, practice makes perfect, so don’t be discouraged if your initial prints aren’t flawless. With time and patience, you’ll master the art of relief printing at home, creating unique and captivating designs that reflect your personality.
Mastering the Art: 5 Essential Tips for Linocut Block Printing
- Experiment with different linoleum block sizes to achieve unique textures and patterns in your prints
- Always carve your design in reverse, considering the mirror image effect when the block is inked and printed
- Use a variety of tools, including gouges, chisels, and scrapers, to create intricate details and depths in your linocut design
- Apply uniform pressure when printing to ensure consistent ink transfer and avoid smudging or blotches
- Test your ink colors on a small, inconspicuous area of the linoleum block before applying them to your final design to guarantee the desired hues and shades
Key Takeaways from Linocut Block Printing
I’ve learned that with a few simple tools, including a linoleum block, carving tools, and some ink, I can create unique and personalized designs that reflect my own style and creativity
By following the steps outlined in this guide, from carving my linoleum block to relief printing at home, I can produce beautiful, handmade prints that make perfect gifts or additions to my own home decor
Most importantly, I’ve discovered that linocut block printing is not just a technique, but an art form that allows me to express myself, tell stories, and connect with others through the tangible, handmade nature of the prints
The Art of Linocut
Linocut block printing is not just a technique, it’s a journey of transforming the ordinary into the extraordinary, where every carve and every print tells a story of its own.
Emily J. Miller
Conclusion
As we’ve explored the world of linocut block printing, it’s clear that this ancient technique offers a unique blend of creativity and tactile expression. From carving linoleum blocks with ease to mastering relief printing at home, the process is just as rewarding as the final product. By following the steps outlined in this guide, you’ve gained the skills to create your own unique designs and patterns, and to experiment with different techniques and materials. Whether you’re a seasoned artist or a beginner, linocut block printing offers a sense of accomplishment that’s hard to find in other creative pursuits.
So as you continue on your linocut block printing journey, remember to always keep exploring, experimenting, and pushing the boundaries of what’s possible. Don’t be afraid to try new things and make mistakes – it’s often the unexpected surprises and happy accidents that lead to the most exciting and innovative results. With patience, practice, and a willingness to take risks, you can unlock the full potential of linocut block printing and create truly stunning works of art that reflect your unique vision and style.
Frequently Asked Questions
What kind of ink is best to use for linocut block printing?
I swear by oil-based ink for linocut block printing – it’s rich, vibrant, and adheres beautifully to paper. Look for a good quality relief printing ink, and make sure to mix it with a little linseed oil for a smooth consistency. Trust me, it makes all the difference in bringing your designs to life!
How do I achieve intricate details when carving my linoleum block?
To achieve intricate details, I swear by using super-fine carving tools – they’re a game-changer. Try using a set with interchangeable tips, it’ll give you the precision you need to carve out tiny patterns and textures. Just be patient and take your time, it’s all about gentle, careful cuts.
Can I use linocut block printing to create multi-colored designs?
I love experimenting with colors in linocut block printing. To create multi-colored designs, you can use a technique called reduction printing, where you carve and print multiple layers of the same block, or try using multiple blocks, each with a different color. It’s a bit more involved, but the results are totally worth it.