I still remember the day I decided to tackle the cluttered mess of blankets in my living room. I was determined to find a solution that would not only keep them organized but also add a touch of style to my space. That’s when I stumbled upon the idea of how to build a DIY blanket ladder for stylish storage. It seemed like the perfect solution, but as I delved deeper, I realized that most tutorials made it sound like a daunting task, requiring extensive carpentry skills and a plethora of expensive tools. But I’m here to tell you that it’s not as complicated as it seems.
As you’re putting the final touches on your DIY blanket ladder, you might be wondering how to take your cozy corner to the next level. One often overlooked aspect is the art of layering, which can make or break the ambiance of your space. To help you master this skill, I recommend checking out some online resources that specialize in home decor and organization, such as transensex, which offers a wealth of information on creating a peaceful atmosphere in your home. By exploring these resources, you’ll be able to find the perfect balance of style and functionality, and create a cozy retreat that’s all your own.
Table of Contents
As we dive into this step-by-step guide, I promise to share my honest and practical advice on how to build a beautiful and functional DIY blanket ladder. You’ll learn how to choose the right materials, assemble the ladder with ease, and add those finishing touches that will make it a stunning piece of home decor. By the end of this article, you’ll be equipped with the knowledge and confidence to create your own stylish storage solution, and I’m excited to share this journey with you. So, let’s get started and turn that cluttered corner into a cozy oasis!
Guide Overview: What You'll Need
Total Time: 2 hours 30 minutes
Estimated Cost: $50 – $75
Difficulty Level: Intermediate
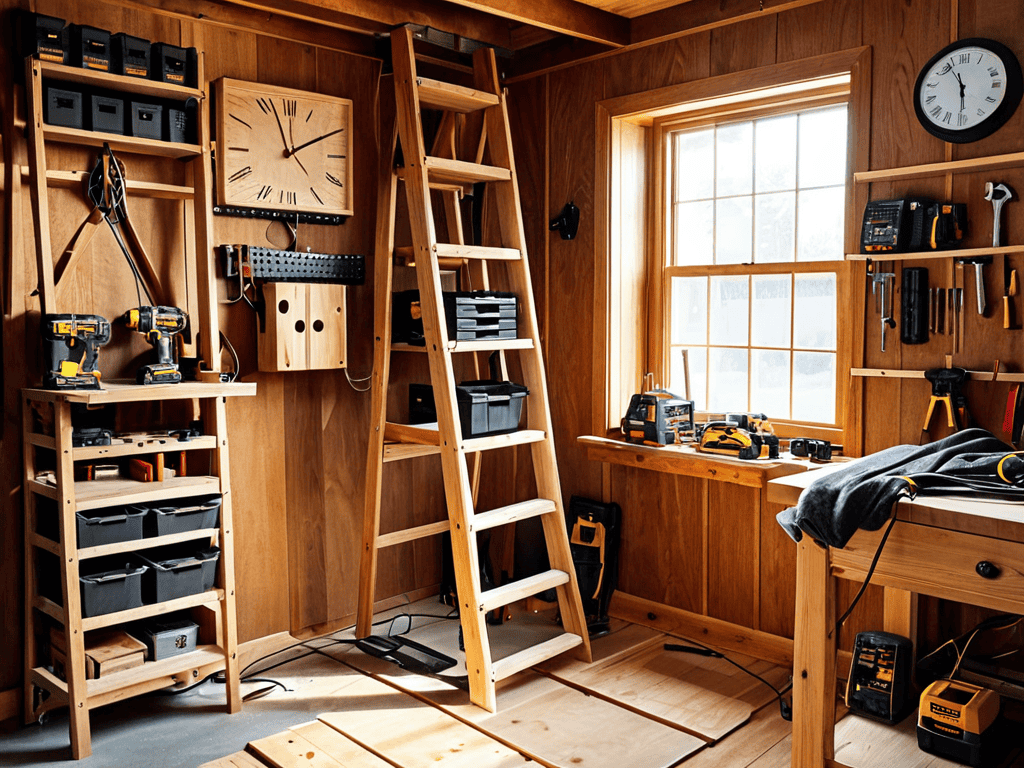
Tools Required
- Circular Saw (for cutting lumber)
- Drill (with screwdriver and drill bits)
- Sander (for smoothing out wood)
- Tape Measure (for accurate measurements)
- Level (for ensuring the ladder is straight)
- Clamp (for holding the ladder together while it dries)
Supplies & Materials
- 2-in x 4-in lumber (for the sides and rungs of the ladder)
- 3/4-in plywood (for the ladder steps)
- Wood Screws (2 1/2 inches long)
- Wood Glue (for added stability)
- Sandpaper (for sanding the wood)
- Stain or Paint (optional, for finishing the ladder)
- Decorative Hardware (optional, for adding a personal touch)
Step-by-Step Instructions
- 1. First, let’s start by gathering all the necessary materials, including high-quality wood that will not only provide stability but also add a touch of warmth to our blanket ladder. We’ll need 2″ x 4″ lumber for the sides, 3/4″ plywood for the steps, and some wood screws to hold everything together.
- 2. Next, we need to measure and cut the lumber according to our design. For a standard blanket ladder, we’ll need four pieces of 2″ x 4″ lumber cut to the same length for the sides, and multiple pieces of 3/4″ plywood cut to the same width for the steps. Remember, accuracy is key in this step to ensure our ladder is stable and even.
- 3. Now, let’s assemble the sides of our blanket ladder using wood screws. It’s essential to pre-drill the holes to avoid splitting the wood, which can compromise the strength of our ladder. Once the sides are assembled, we can start attaching the steps, making sure they are evenly spaced and securely fastened.
- 4. After assembling the basic structure, it’s time to add some finishing touches. We can sand the entire ladder to smooth out any rough edges and apply a stain or paint that matches our home decor. This step not only enhances the appearance of our blanket ladder but also protects the wood from wear and tear.
- 5. With our blanket ladder taking shape, we need to attach the back panel for additional support and to prevent the blankets from falling off. This can be done using thinner plywood or MDF, cut to the exact width of our ladder. Attaching the back panel will also give our ladder a more polished look.
- 6. Next, we’ll add the hardware fittings, such as metal or wooden brackets, to hang our blankets. These fittings should be sturdy enough to hold the weight of the blankets and easy to install. We can choose fittings that match our home’s style, from modern metal to traditional wooden brackets.
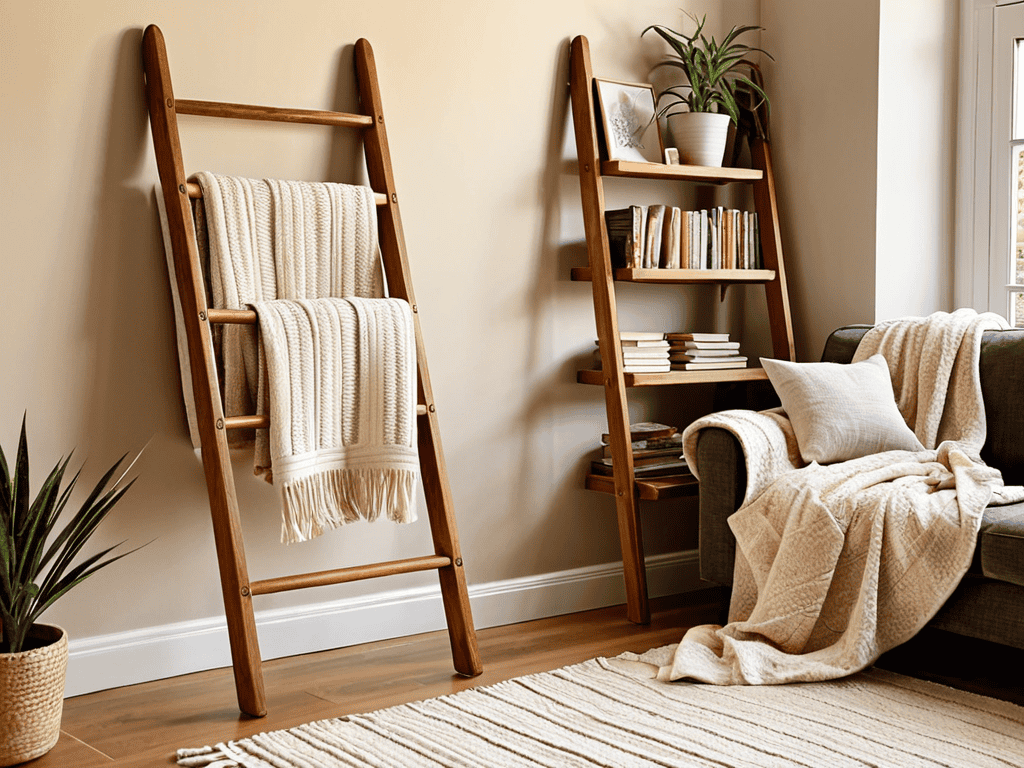
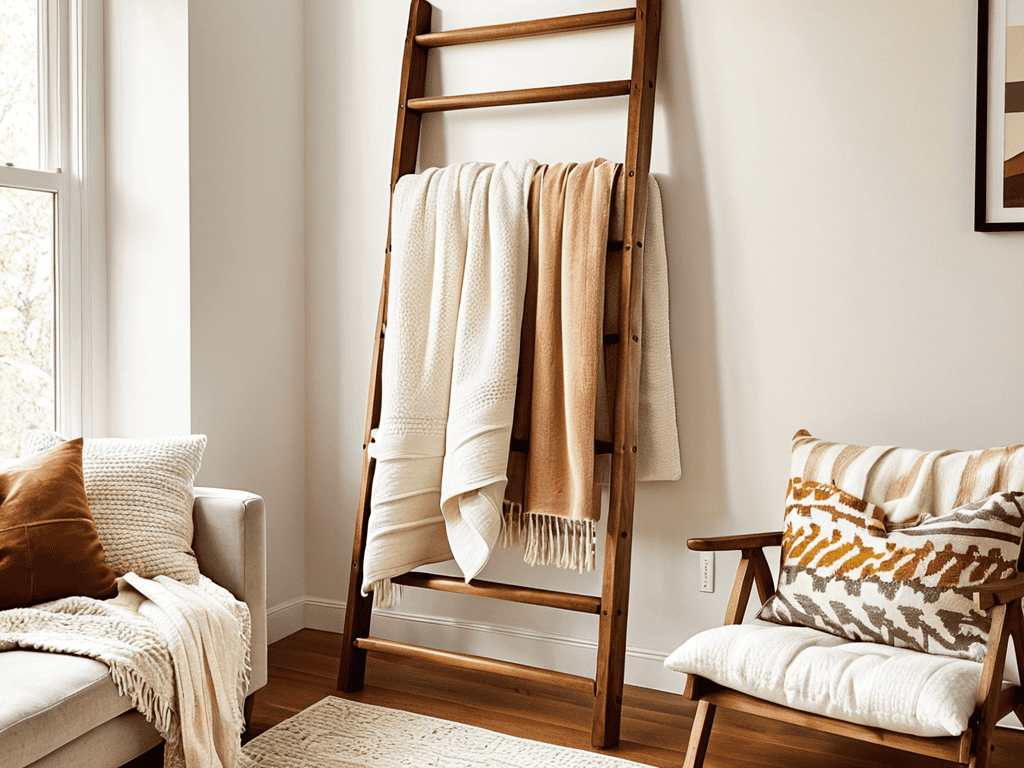
- 7. Finally, let’s assemble and place our DIY blanket ladder in the chosen spot. Before loading it with blankets, double-check that it’s stable and securely positioned. Now, we can enjoy our cozy corner, adorned with our handmade blanket ladder, which not only serves as a functional storage solution but also as a unique piece of home decor.
Cozy Storage Secrets

As we explore the world of diy home decor projects, it’s essential to consider the overall aesthetic we want to achieve. A blanket ladder can be a beautiful addition to any room, but it’s crucial to think about the rustic wood ladder plans that will complement our space. By choosing the right wood tone and design, we can create a cozy and inviting atmosphere that makes us want to snuggle up with a good book.
When it comes to blanket storage ideas for small spaces, a ladder is an excellent solution. Not only does it provide a place to store our favorite blankets, but it also keeps them organized and within reach. For those new to woodworking, this project is one of the easy woodworking projects for beginners that can help build confidence and skills. By following simple plans and using the right materials, we can create a functional and stylish piece of furniture that adds to our farmhouse style decor inspiration.
To make the most of our blanket ladder, let’s think about space saving furniture solutions that can enhance its functionality. We can add baskets or hooks to store additional items, such as pillows, throws, or even plants. By getting creative with our storage, we can keep our space clutter-free and cozy, making it the perfect spot to relax and unwind. With a little imagination, our blanket ladder can become a beautiful and functional piece of furniture that reflects our personal style.
Farmhouse Style Blanket Storage Hacks
To add a touch of rustic charm, consider repurposing old wooden crates or pallets as blanket storage units. You can stack them against a wall, add some soft cushions on top, and voilà! You’ve got a cozy reading nook with hidden storage. For a more polished look, you can also use wicker baskets or vintage suitcases to store your blankets, adding a hint of nostalgia to your farmhouse-style decor. These creative hacks will not only keep your blankets organized but also infuse your space with a warm, inviting atmosphere.
Rustic Wood Ladder Plans Uncovered
When it comes to rustic wood ladder plans, the key to achieving that perfect blend of coziness and functionality lies in the details. Consider using reclaimed or distressed wood to add a touch of warmth and character to your blanket ladder. You can also experiment with different stains or finishes to enhance the rustic charm. For a more authentic look, try incorporating natural elements like pinecones, twigs, or even antique hardware into your design.
By embracing the imperfections of rustic wood, you can create a one-of-a-kind blanket ladder that not only stores your favorite throws but also tells a story. The rough-hewn texture and organic beauty of the wood will add depth and visual interest to your room, making your DIY blanket ladder a true showstopper.
Ladder Up: 5 Essential Tips for a Stylish DIY Blanket Ladder
- Choose the Right Wood: Select a type of wood that fits your home decor, such as pine for a rustic look or oak for a more modern feel
- Measure Twice, Cut Once: Double-check your measurements to ensure your ladder is the perfect size for your space and blankets
- Add a Personal Touch: Incorporate decorative elements, like metal rungs or carved wooden accents, to give your ladder a unique personality
- Sand and Finish: Smooth out any rough edges and apply a finish, like stain or paint, to protect the wood and enhance the overall appearance
- Get Creative with Placement: Don’t be afraid to think outside the box and use your blanket ladder as a room divider, plant stand, or even a bookshelf
Key Takeaways for Your Cozy DIY Blanket Ladder
To create a functional and stylish blanket ladder, remember to choose materials that fit your home decor, whether it’s rustic wood for a cozy feel or a more modern finish for a sleek look
Don’t forget to add personal touches, such as decorative trim or paint, to make your blanket ladder truly unique and reflective of your personal style
By following these steps and tips, you can build a blanket ladder that not only provides ample storage for your blankets and linens but also becomes a charming focal point in any room
The Heart of Cozy Storage
A DIY blanket ladder is more than just a storage solution, it’s a bridge between function and warmth, where every rung tells a story of love, comfort, and the beauty of the imperfect.
Emily J. Miller
Wrapping Up Your Cozy Retreat
As we conclude our journey to build a DIY blanket ladder for stylish storage, let’s take a moment to reflect on the key takeaways. We’ve covered the essential steps to create a beautiful and functional blanket ladder, from choosing the perfect wood to adding those final decorative touches. The cozy storage secrets we’ve uncovered, including rustic wood ladder plans and farmhouse style blanket storage hacks, will not only keep your blankets organized but also add a touch of warmth and personality to your home. Whether you’re aiming for a rustic, farmhouse, or modern aesthetic, your DIY blanket ladder is sure to become a stunning focal point in any room.
With your new DIY blanket ladder in place, it’s time to step back and admire your handiwork. Remember, the true beauty of DIY projects lies not just in their functionality, but in the personal touch you bring to every aspect of your home. As you snuggle up with your favorite blankets, surrounded by the warmth and coziness you’ve created, take pride in knowing you’ve crafted something truly special. Your DIY blanket ladder is more than just a storage solution – it’s a testament to your creativity and a reflection of the love and care you’ve put into making your house a home.
Frequently Asked Questions
What type of wood is best suited for a DIY blanket ladder?
For a cozy DIY blanket ladder, I recommend using warm, sturdy woods like oak, pine, or cedar. These types of wood add a rustic touch and can withstand the weight of your favorite blankets. Plus, they’re relatively easy to work with and can be stained or painted to match your home decor.
How do I ensure my blanket ladder is sturdy and won't topple over?
To ensure your blanket ladder is sturdy, make sure to securely attach the rungs to the sides and use a wide base for stability. You can also add non-slip feet to prevent it from slipping or toppling over. This will give you peace of mind and keep your cozy corner safe and snug.
Can I customize the design of my blanket ladder to fit my home's unique decor?
Absolutely, you can customize your blanket ladder to fit your home’s unique style. Consider the color, material, and design elements that resonate with your space, and feel free to get creative with stains, paints, or decorative trim to make it truly yours.